Free Crochet Pumpkin Pattern: Amigurumi with a Witch Hat
Make a smiling amigurumi with this free crochet pumpkin pattern, featuring counted rounds, seven sculpted grooves, a green stem, and a tiny witch hat.

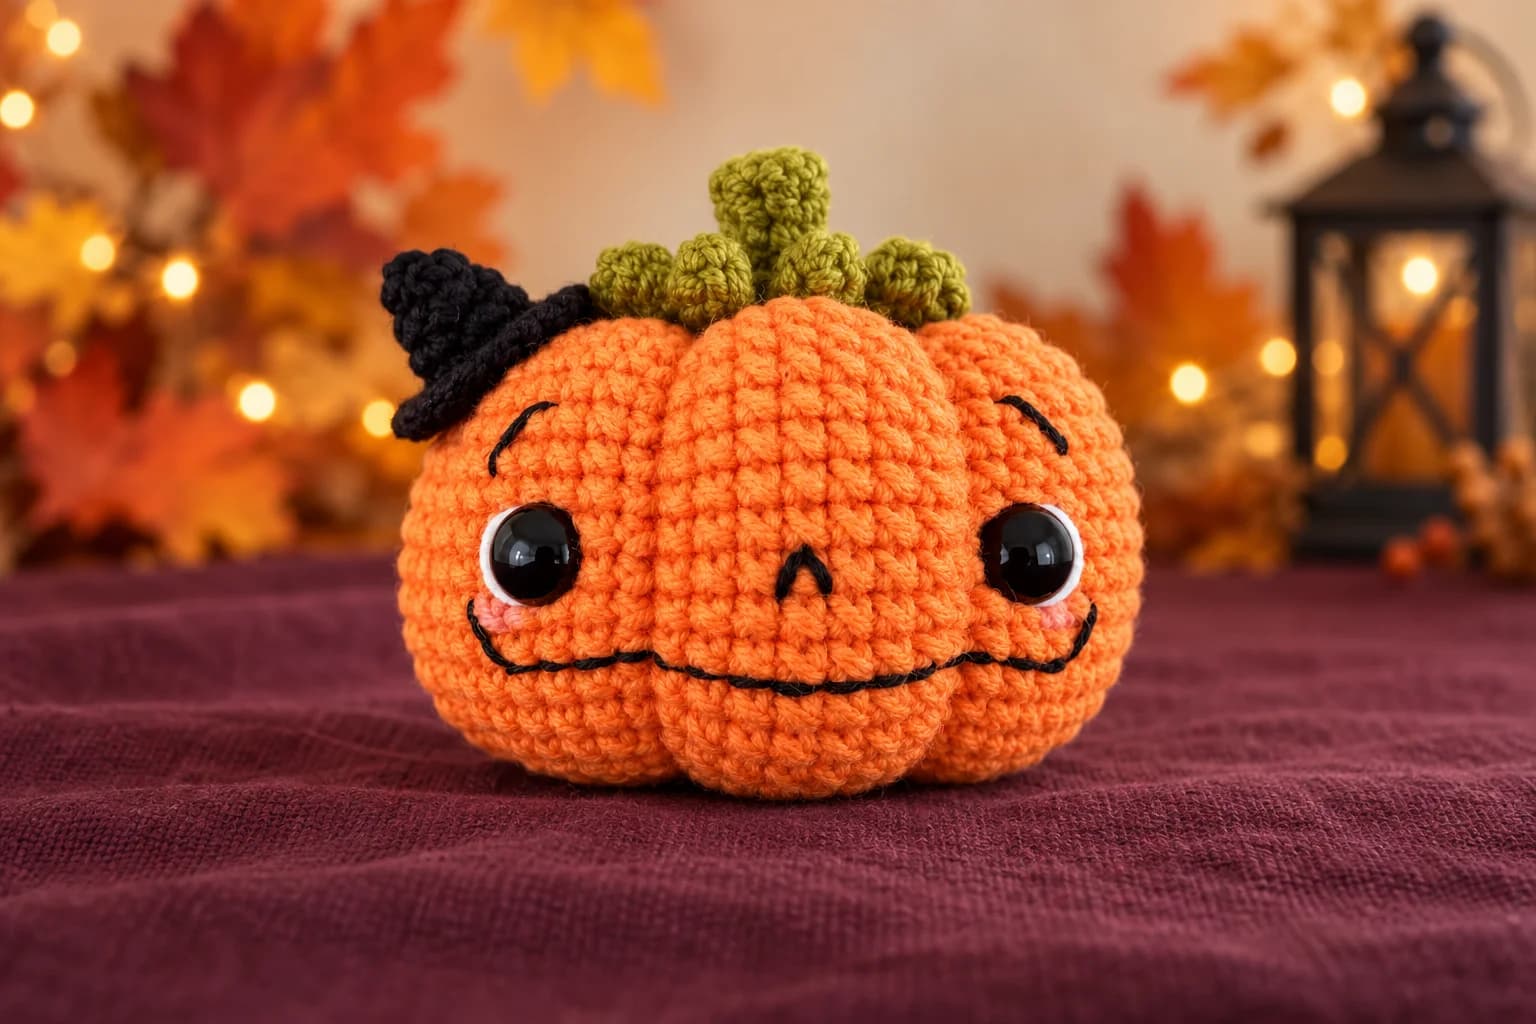
This free crochet pumpkin pattern makes a smiling Halloween amigurumi with seven sculpted grooves, a green stem, and a tiny black witch hat perched to one side. Crochet the round orange body first, add the face while the inside is accessible, then use a long yarn tail to give the pumpkin its rounded sections.
The body is worked in continuous rounds with US terms, starting with seven stitches and expanding to 56. Its shape comes from both the crochet and the finishing: before you cinch the grooves, it will look much rounder than the finished pumpkin.
The little hat and stem are separate pieces sewn on at the end. Keep a marker in your first stitch, count before changing sections, and leave a generous tail for sculpting.
1. Gather yarn and tools
Use a 2 mm crochet hook with smooth yarn that makes a firm, workable fabric. Use matching yarn thicknesses for the body, stem, and hat so the accessories remain in proportion.
| Supply | What you need it for |
|---|---|
| Orange yarn | Body and the seven sculpting passes |
| Green yarn | Stem and small leafy edging |
| Black yarn | Tiny witch hat |
| Two 7 mm oval safety eyes | The pumpkin's eyes |
| White embroidery thread | Small lower-eye accents |
| Black sewing or embroidery thread | Nose, mouth, and eyebrows |
| Optional pink or grey yarn | Small decorative accents |
| Fiberfill | Stuffing the pumpkin |
| Tapestry needle, scissors, stitch marker | Sewing, shaping, and keeping track of rounds |
| Optional blush or suitable craft paint | A light cheek tint |
The tested instructions specify the hook and eye size but do not give a yarn brand, yardage, numerical gauge, or measured finished dimensions. Keep those choices consistent across the pieces; a 2 mm hook alone does not guarantee a particular pumpkin size. Our crochet hook sizes and types guide explains how yarn, hook, and tension work together.
Treat this project as a decorative Halloween figure. If you prefer to avoid plastic eyes, embroider the eyes instead, securing the thread ends inside before closing the body.
2. Learn the stitch key and special increase
- MR: adjustable magic ring.
- sc: single crochet.
- inc: 2 sc in the same base stitch.
- dec: single crochet 2 stitches together.
- sl st: slip stitch.
- ch: chain.
- BLO: back loop only, the loop farther from you at the top of the stitch.
- FLO: front loop only, the loop nearer to you.
- st / sts: stitch / stitches.
Use X-shaped single crochet consistently. One common way to form it is to yarn under when drawing up the first loop, then finish the single crochet. This changes the stitch appearance and can change tension; it does not guarantee the finished size.
Special body increase, rounds 2–8: work the first sc through both loops of the base stitch, then work the second sc into the back loop of that same base stitch. That pair is one increase. Ordinary sc stitches between the increases go through both loops.
From rounds 9–19, every sc is worked in BLO. The decrease section then uses ordinary sc and sc2tog through both loops. Do not carry the special body increase into the green stem or black hat; their increases are regular 2-sc increases.
Continuous rounds: do not join with a slip stitch or add a turning chain between body rounds. Move the marker to the first actual sc of each new round. If reading repeats is new to you, see our crochet abbreviation guide.
3. Crochet the orange pumpkin body
Begin with orange yarn. Use the special increase described above in rounds 2–8.
| Round | Instructions | Stitch count |
|---|---|---|
| 1 | Work 7 sc into an MR. Tighten the ring. | 7 |
| 2 | Inc in every stitch. | 14 |
| 3 | Repeat (1 sc, inc) 7 times. | 21 |
| 4 | Repeat (2 sc, inc) 7 times. | 28 |
| 5 | Repeat (3 sc, inc) 7 times. | 35 |
| 6 | Repeat (4 sc, inc) 7 times. | 42 |
| 7 | Repeat (5 sc, inc) 7 times. | 49 |
| 8 | Repeat (6 sc, inc) 7 times. | 56 |
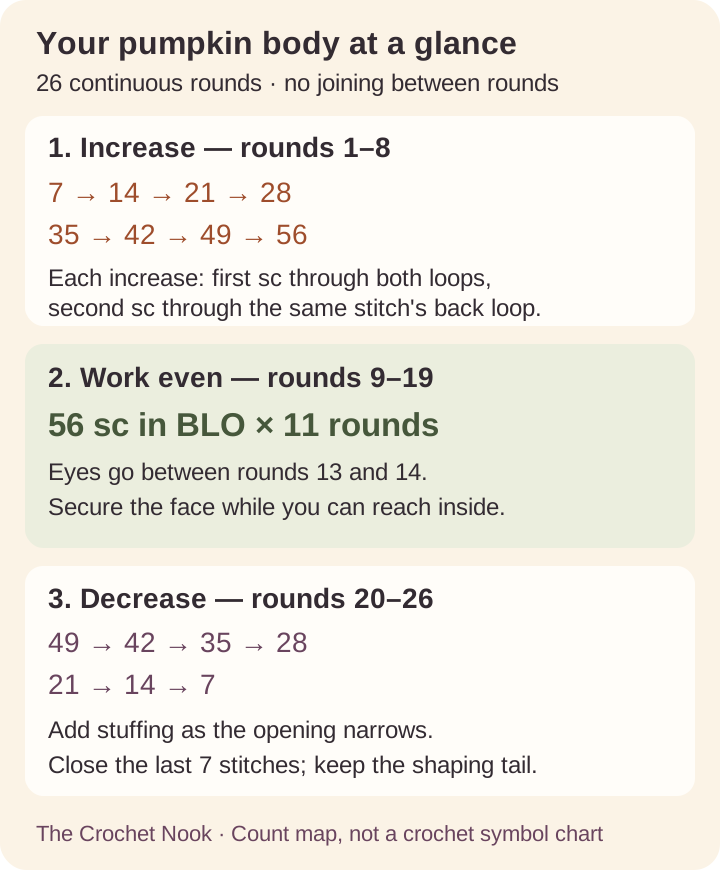
| 9–19 | Work 56 sc in BLO in each round. | 56 per round |
Rounds 9 through 19 are 11 rounds, not ten. Keep a tally or move a second marker after each completed round. At this point the body remains open so you can attach the eye washers and secure the embroidery from inside.
4. Add the pumpkin face before closing
Place the 7 mm oval eyes between rounds 13 and 14, 13 stitch positions apart: mark the first eye position, then count 13 stitch positions along the round to mark the second. Check the expression from the front before securing the washers.
The final grooves can move the fabric slightly, so leave room beside the eyes for the sculpting strands. Keep the strongest front groove away from either eye post.
- Add a short white embroidered waterline along the lower edge of each eye.
- With black thread, stitch a small inverted-triangle nose centered between the eyes.
- Position the mouth two rows below the eyes. Mark its center and ends before stitching a broad, gently curved smile. The reference face has a wide smile; its exact stitch width is a styling choice rather than a fixed count in the instructions.
- Add subtle eyebrows one row above the eyes.
- Secure the thread tails inside without pulling the face into unwanted dents.
Add small pink cheek stitches if desired, or wait until finishing to apply a light tint. Grey accents are optional; you can leave them out without changing the construction.
5. Decrease, stuff, and close the body
Return to both loops for the plain sc and decreases. A standard sc2tog consumes two stitches and produces one: draw up a loop in the next stitch, draw up a loop in the following stitch, then yarn over and draw through all three loops.
| Round | Instructions | Stitch count |
|---|---|---|
| 20 | Repeat (6 sc, dec) 7 times. | 49 |
| 21 | Repeat (5 sc, dec) 7 times. | 42 |
| 22 | Repeat (4 sc, dec) 7 times. | 35 |
| 23 | Repeat (3 sc, dec) 7 times. | 28 |
| 24 | Repeat (2 sc, dec) 7 times. | 21 |
| 25 | Repeat (1 sc, dec) 7 times. | 14 |
| 26 | Work 7 decreases. | 7 |
Add small pieces of fiberfill as the opening narrows. Fill firmly enough to support the pumpkin, but keep the fabric flexible enough to cinch. If stuffing stretches the stitches into visible gaps, remove a little rather than forcing more inside.
Fasten off, leaving a very long orange tail for closing and sculpting. Thread it through the front loops of the seven remaining stitches, draw the opening closed, and secure it. Keep the tail attached to the needle for the next step.
6. Sculpt seven pumpkin grooves
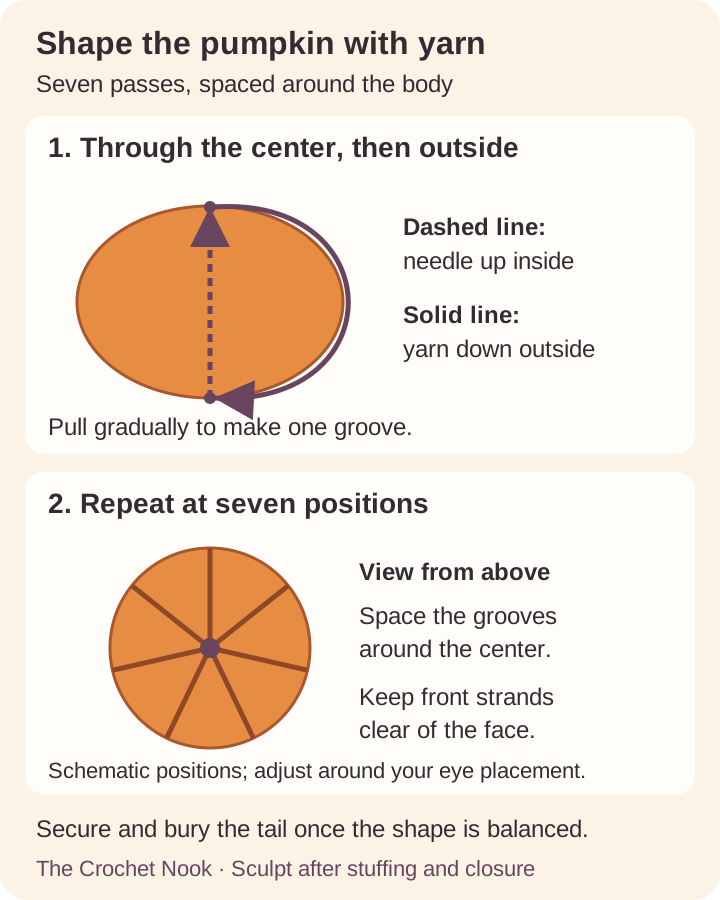
The initial magic ring and final closure are the two center points used for shaping. To match the reference's crown, place the green stem at the initial magic-ring center; the final closure can sit underneath. Gently flatten the opposite center to form the base.
- Start with the needle at the bottom center. Pass it through the middle of the stuffing and out at the top center.
- Bring the yarn down over the outside of the pumpkin, following one vertical line, then insert the needle at the bottom center again.
- Pass through the center and emerge at the top. Pull gradually until the outside strand forms a groove.
- Repeat the center pass and outside wrap at evenly spaced positions until you have seven grooves in total.
- Adjust the tension a little at a time so the pumpkin has rounded lobes, then secure the tail and bury its end inside.
Before tightening each front strand, check that it avoids the eye posts and preserves the smile. A temporary yarn marker at each proposed groove makes the spacing easier to compare. Do not add extra decrease rounds to make the pumpkin flatter; this step supplies the shaping.
7. Crochet the green stem and leafy detail
With green yarn, work in continuous rounds until the decorative edging.
| Round | Instructions | Stitch count |
|---|---|---|
| 1 | Work 7 sc into an MR. | 7 |
| 2 | Sc in every stitch. | 7 |
| 3–5 | Sc in every stitch in each round. | 7 per round |
| 6 | In FLO, inc in every stitch. | 14 |
| 7 | Repeat (1 sc, inc) 7 times. | 21 |
Round 8, leafy edging: repeat the following sequence 7 times: sl st into the next base stitch, ch 4, then, starting in the second chain from the hook, work 3 sc back along the chain. After returning along a chain, move to the next base stitch for the next slip stitch.
This supplied sequence makes seven narrow leaf spokes anchored into seven of the 21 base stitches. It is a partial decorative edge: the other 14 base stitches remain unworked. Keep those stitches available for sewing the flared base to the pumpkin; do not add unlisted skips or additional leaves to make a complete edging round.
Fasten off with a sewing tail. Arrange the leaf cluster around the front or side of the stem, pin the green base over the top center, and sew it securely in place. Keep the stitches beneath the green base so they do not show across the orange fabric.
8. Make and attach the tiny witch hat
Use black yarn. This is a small tilted accessory, not a hat that covers the whole pumpkin.
| Round | Instructions | Stitch count |
|---|---|---|
| 1 | Work 6 sc into an MR. | 6 |
| 2 | Repeat (2 sc, inc) twice. | 8 |
| 3 | Repeat (3 sc, inc) twice. | 10 |
| 4 | Repeat (4 sc, inc) twice. | 12 |
| 5 | In FLO, inc in every stitch to form the brim. | 24 |
Fasten off with a tail for sewing. Pin the hat beside the stem, tilted toward one side, and view the pumpkin from the front. When you like the angle, sew through the lower hat edge and the pumpkin fabric at several points so the hat holds its position.
Finish any optional cheek tint with a very light application. Try the blush or paint on a spare yarn scrap first; let painted details dry completely. Weave in all remaining ends and give the stem, hat, and face a final check before displaying your pumpkin.
Tips & troubleshooting
The pumpkin is round instead of squat. Complete all seven sculpting passes and adjust their tension gradually. The stuffed crochet body needs the outside strands to create its lobes.
I have the wrong count after an increase round. Each body increase round adds seven stitches. Check that both stitches of an increase share one base stitch, even though they use different loop placement.
The stem edging does not reach all the way around. Seven leaf repeats use seven base stitches. The remaining 14 stitches are left plain and become part of the sewn attachment edge; the pattern does not call for a leaf in every base stitch.
A shaping strand crosses the face. Loosen that strand before securing the tail and move its path between the facial details. Rebalance the neighboring grooves rather than forcing the strand over an eye or through the smile.
The stuffing shows. Check both tension and stuffing pressure. For a fresh piece, choose a yarn and hook combination that gives a firm fabric; for the piece in progress, remove excess filling before closing.
Frequently Asked Questions
Is this free crochet pumpkin pattern suitable for beginners?
It suits a confident beginner who knows single crochet, increases, decreases, and working in continuous rounds. You will also use back and front loops, embroidery, and a needle to sculpt the grooves. For an easier construction to practice first, try our flat-panel pumpkin tutorial.
Is this a no-sew pumpkin pattern?
The orange body is crocheted as one piece, but the stem and tiny hat are sewn on. You also use a needle for the face and seven shaping passes, so allow time for finishing after the crochet rounds.
Can I use chunky or chenille yarn?
You can experiment with a different yarn and a suitable hook, but that changes the size and may change how the narrow stem and tiny hat look. The supplied version specifies a 2 mm hook and 7 mm eyes; it does not provide tested measurements for a chunky-yarn version.
Why are rounds 9–19 worked in the back loop only?
Working through the back loop leaves the front loop visible and gives the body its surface detail. The deeper pumpkin grooves are made separately with the long orange tail after stuffing. Keep all 11 rounds at 56 stitches.
How do I make the seven grooves without distorting the face?
Mark the groove paths before tightening, keep the strands away from eye posts, and adjust the tension gradually around the pumpkin. Spread the filling evenly and pull only enough to create rounded sections without dragging the smile sideways.
Can I leave off the face or witch hat?
Yes. The facial details and separate hat are decorative additions, so leaving either off does not change the orange body's round counts. The pumpkin can also be displayed with just its green stem for a simpler autumn look.
More Halloween crochet projects
- Make a ribbed crochet pumpkin for fall decor if you prefer working a flat rectangle and joining it into a shape.
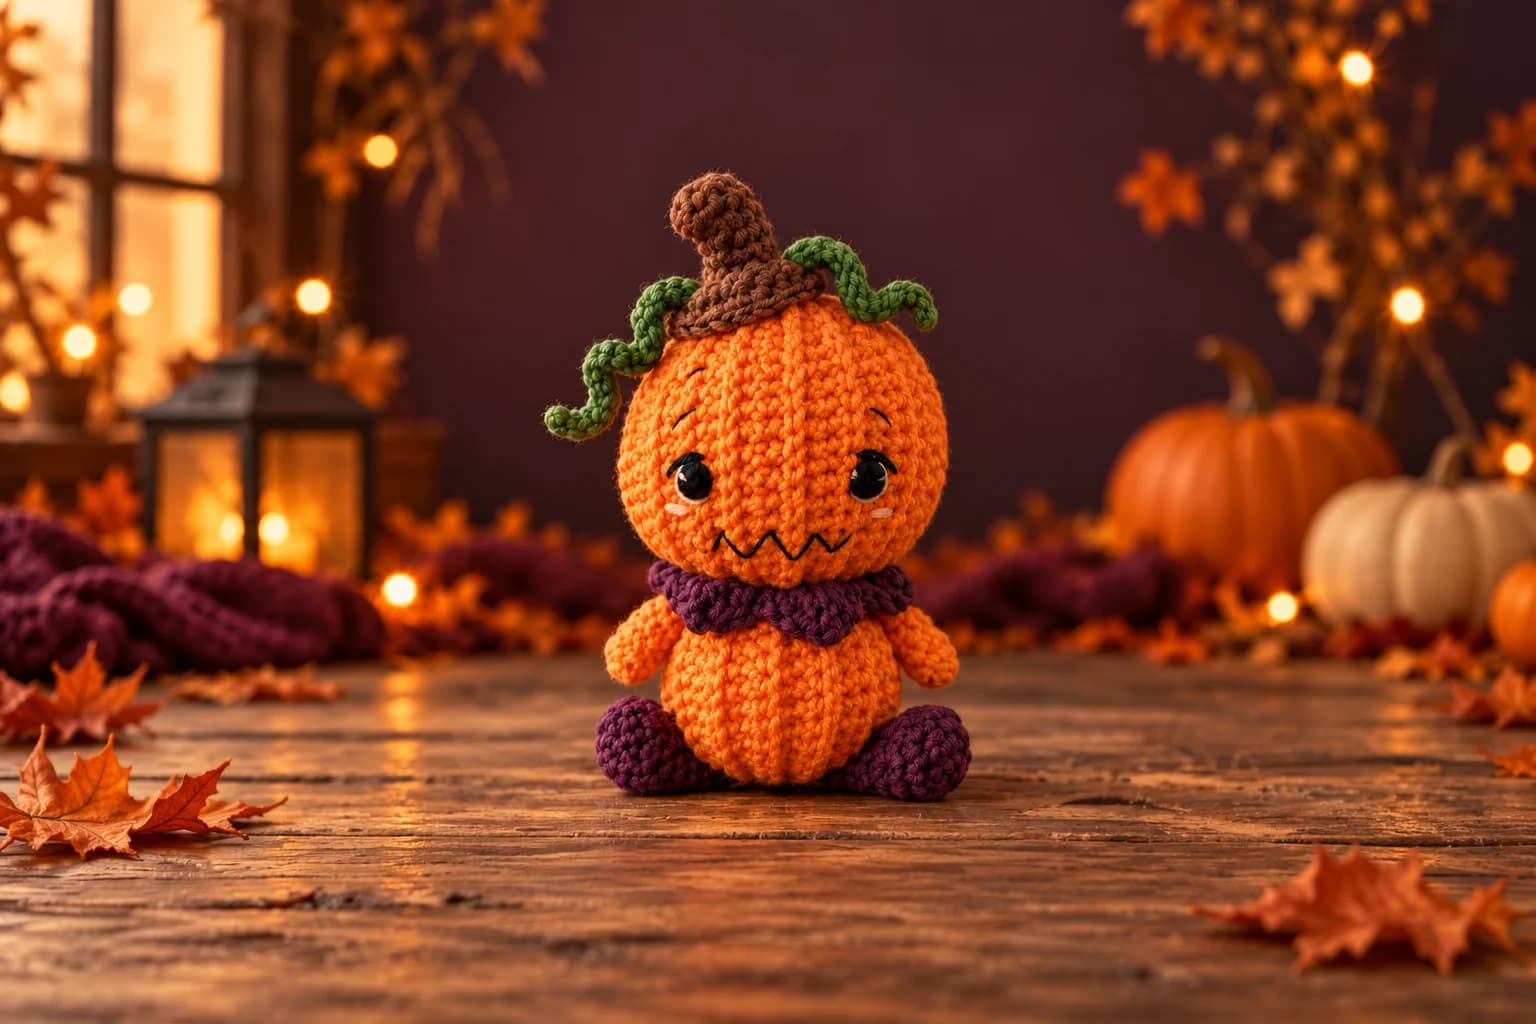
- Try our crochet pumpkin doll pattern for a separate head and body, little limbs, and a scalloped collar.
- Make a small crochet ghost keychain to hang beside your autumn display.
- Crochet pumpkin and cat candy baskets for another Halloween project with a practical opening.
- Browse the Halloween amigurumi collection for more characters and construction styles.
Add a Pumpkin Bear companion
Visit our Pumpkin Bear PDF signup section for a separate bear-shaped pumpkin project. Sign up and confirm your email to receive that printable guide and occasional crochet emails. The Pumpkin Bear PDF is a different pattern from the witch-hat pumpkin on this page.
Essential crochet guides
Maker notes
Questions or finished-project notes?
Share what helped, ask about a step, or leave a thoughtful note for the next maker.
Loading maker notes...