Crochet Pumpkin Pattern for Fall Decor
A counted ribbed crochet pumpkin rectangle with three size options, slip-stitch tube seaming, controlled stuffing, six shaped ridges, and a firm stem.

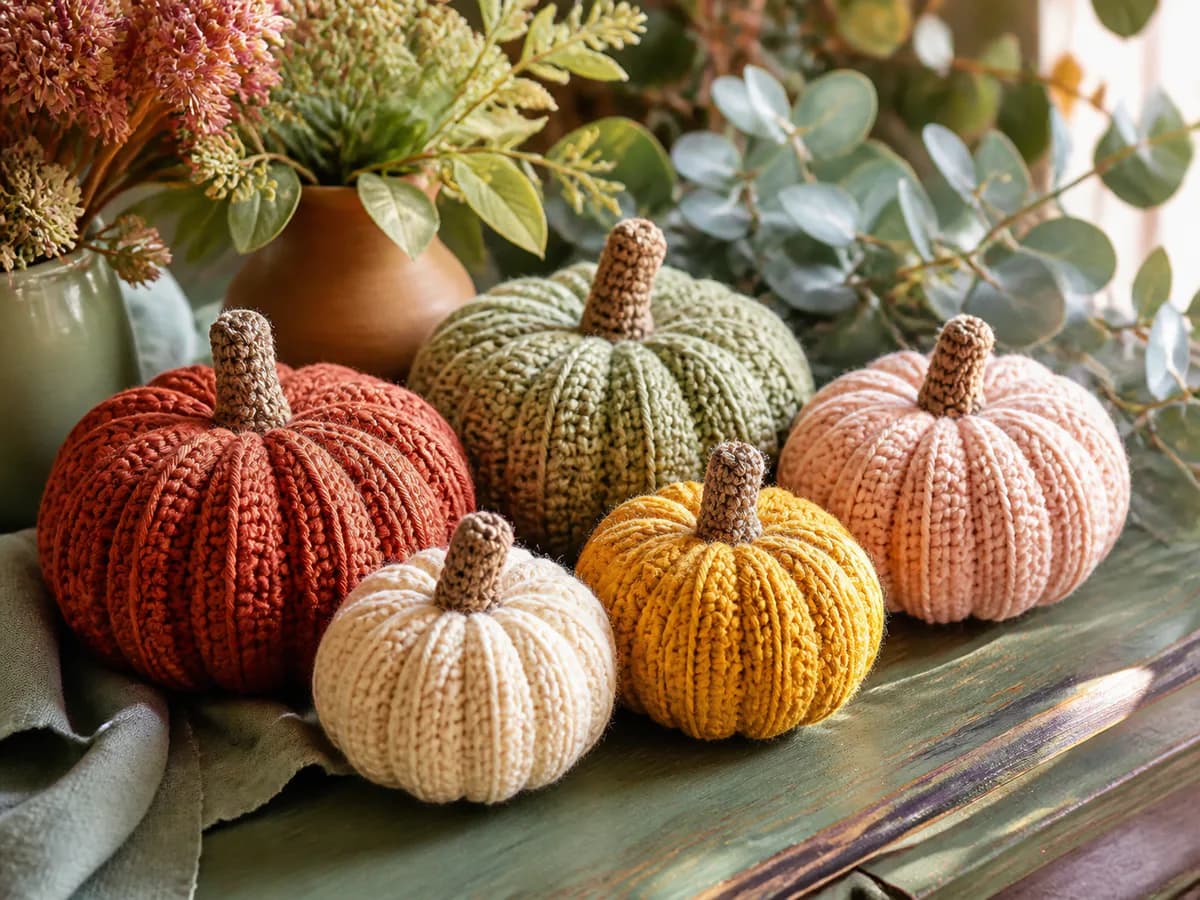
Make a ribbed crochet pumpkin from a flat rectangle, then seam, gather, and shape it into six rounded sections. The three starting counts below let you vary the scale without learning a different construction for each pumpkin. These are indoor decorations, not baby toys.
Materials and supplies
- DK or worsted stash yarn in project colors
- 3.5-4.5 mm hook
- Embroidery yarn
- Stitch marker and yarn needle
- Washable toy stuffing for the pumpkin and stem
- Long upholstery needle for shaping ridges
Crochet terms used
The instructions in Crochet Pumpkin Pattern for Fall Decor use US terms: ch (chain), sl st (slip stitch), sc (single crochet), hdc (half double crochet), dc (double crochet), inc (two stitches in one), and dec (decrease). Counts in parentheses show the stitches expected after that row or round.
Ribbed pumpkin pattern
Choose a starting size and check your fabric
Use the same yarn and hook for a coordinated set. Small, medium, and large describe relative sizes in that yarn, not guaranteed finished diameters.
| Starting size | Foundation chains | Hdc in each row | Starting total rows |
|---|---|---|---|
| Small | 16 | 15 | 24 |
| Medium | 24 | 23 | 36 |
| Large | 32 | 31 | 48 |
Make a small back-loop hdc swatch first. The fabric should bend easily without revealing stuffing through the stitches. If gaps are large, try a smaller hook and measure again; DK and worsted yarn will not produce identical dimensions.
To estimate the flat panel, divide the stitch count by your stitches per cm for its height, and divide the row count by your rows per cm for its circumference before gathering. For example, if your own swatch measures 15 hdc and 12 rows per 10 cm, the small 15-stitch, 24-row panel measures about 10 by 20 cm. This is a calculation example, not a sample gauge. Stuffing and cinching determine the final pumpkin height and diameter.
The yarn quantity depends on your yarn, gauge, and chosen panel. For a shopping estimate, weigh your swatch and scale its weight by the panel-area-to-swatch-area ratio, then allow additional yarn for the seam, closures, shaping, and stem. Keep that allowance separate; panel weight alone is not a finished-project quantity.
Crochet the ribbed rectangle
Choose small, medium, or large and chain 16, 24, or 32.
- Row 1: Hdc in the second chain from the hook and in each remaining chain. (15, 23, or 31 stitches)
- Row 2: Ch 1 and turn; this chain does not count as a stitch. Hdc in the back loop of every stitch, including the first and last. Keep 15, 23, or 31 stitches.
- Repeat row 2 until you have 24, 36, or 48 rows in total, including row 1. Measure with the fabric relaxed. Aim for the distance from the foundation row to the final row to be about twice the length of one row; add or remove rows if your gauge makes the panel noticeably different.
Mark the first and last stitch of each row if the edges begin to taper. The single turning chain is intentional here; do not add an extra stitch into it.
Seam and close the tube
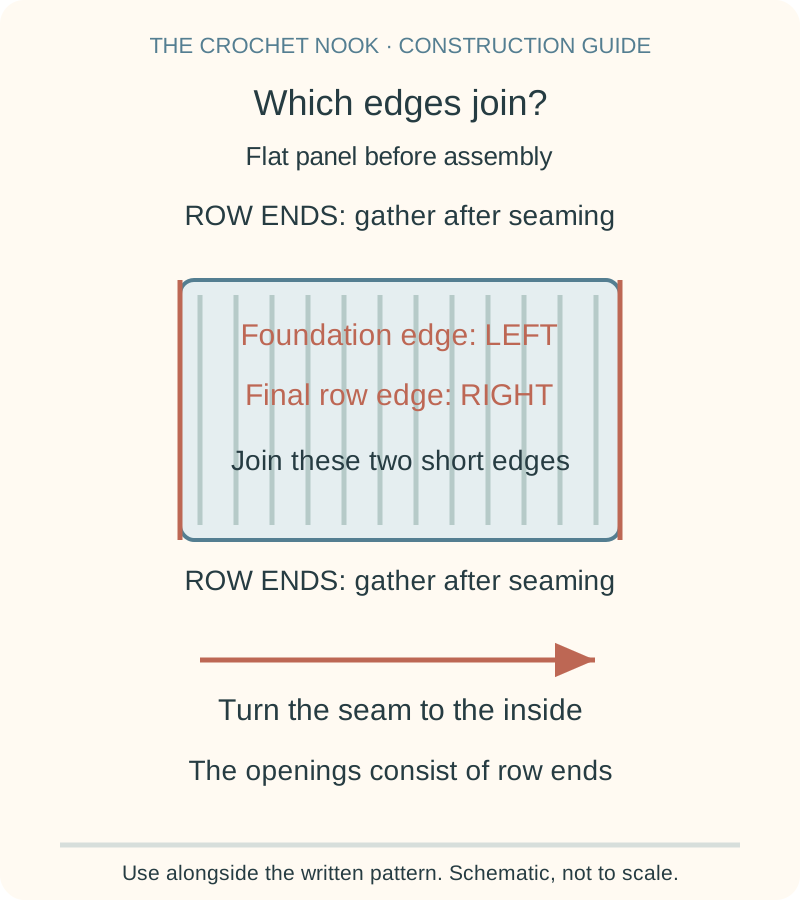
Bring the foundation chain edge and final row edge together. Match the 15, 23, or 31 stitch positions and slip stitch through corresponding loops across, keeping the seam as flexible as the ribbing. Turn the tube so the seam sits inside. The two openings should now consist of row ends, not the foundation stitches.
Thread a separate long strand onto a yarn needle. Run it through a secure loop at every row end around the bottom opening. Draw the opening closed in stages, stitch across the remaining center gap in several directions, and secure the tail inside. If the yarn starts to fray, stop and use a fresh stronger strand rather than pulling harder.
Add stuffing a little at a time, leaving enough give to shape the sides. Gather the top row-end opening in the same way and close the center gap. A hard-packed ball is difficult to cinch; remove some stuffing before closing if necessary.
Shape six sections and add the stem
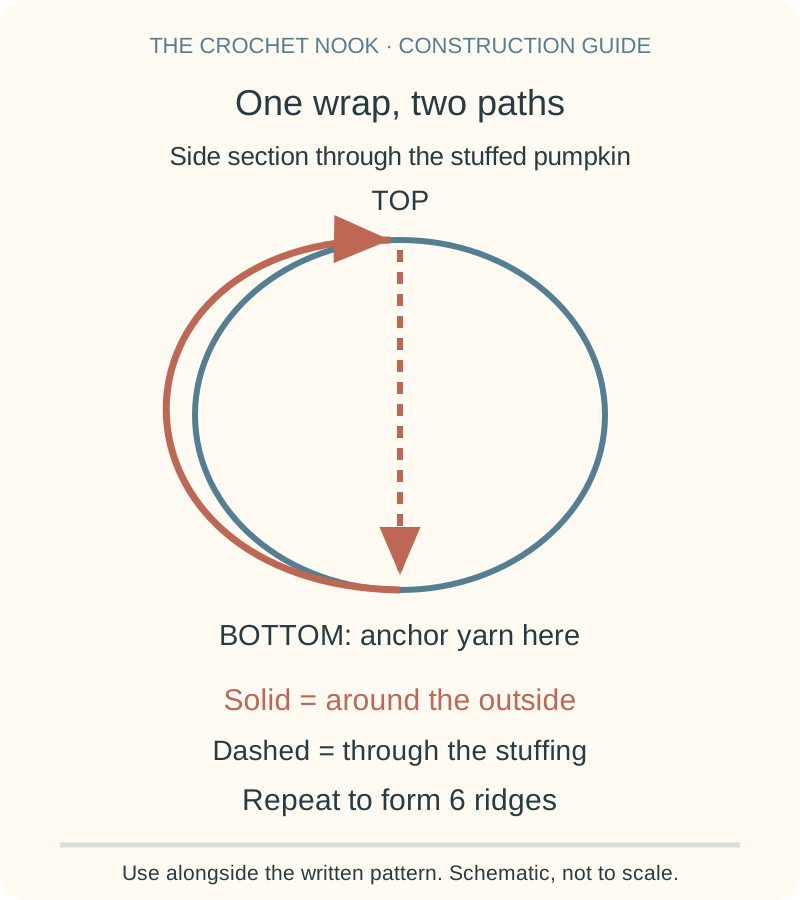
Anchor a long shaping strand at the bottom center. Take it around the outside to the top center, then pass the needle through the stuffing back to the bottom center. Tighten gently to form one groove. Repeat this outside-and-through path at equal intervals to form 6 ridges, keeping the seam in one groove. Passing through the center alone only squashes the pumpkin; the outside wraps create the sections. Secure and bury both tails.
For the stem, work in continuous sc rounds with a marker: round 1, 6 sc in a magic ring; rounds 2-6, sc in each stitch. (6 stitches in every round) Lightly stuff the stem, leave its base open, and sew all six base stitches securely around the top closure. Weave in the tail and check that the stem does not wobble.
Tips & troubleshooting
Why is the rectangle slanting?
Count the stitches at both ends of each row. Missing the last back-loop hdc narrows the panel; working into the turning chain adds width. Use two markers and correct the first affected row before seaming.
Why will the center not close?
Overstuffing or a gathering strand that skips row ends can leave a hole. Remove a little filling, distribute the gathers evenly, and sew across the remaining gap. Do not conceal an open hole under the stem.
How do I make the sections even?
Place six removable markers around the pumpkin before wrapping the shaping yarn. Tighten each wrap gradually and compare opposite sections. Stop if the strand cuts into or distorts the fabric.
Frequently Asked Questions
Can I use chunky yarn?
Yes, but keep the fabric dense enough to contain stuffing and measure the rectangle before assembly. The same stitch counts make a larger panel in thicker yarn. Follow the proportion check rather than assuming a fixed finished size.
Does this pumpkin need a magic ring?
Only the stem starts with a magic ring. The main pumpkin is worked flat in rows, joined into a tube, and gathered at both ends. Practice the small ring separately if it is new to you.
How much yarn should I buy?
Use a weighed swatch and your planned panel area for a starting estimate, then add yarn for finishing and the stem. A precise yardage cannot be inferred from the three stitch counts alone because yarn thickness, tension, and filling change the result.
Can I wash the decoration?
Follow the care instructions for both yarn and stuffing. Dry it completely before storage, check the stem and closures after washing, and keep the decoration away from candles and other heat sources.
More Halloween crochet projects
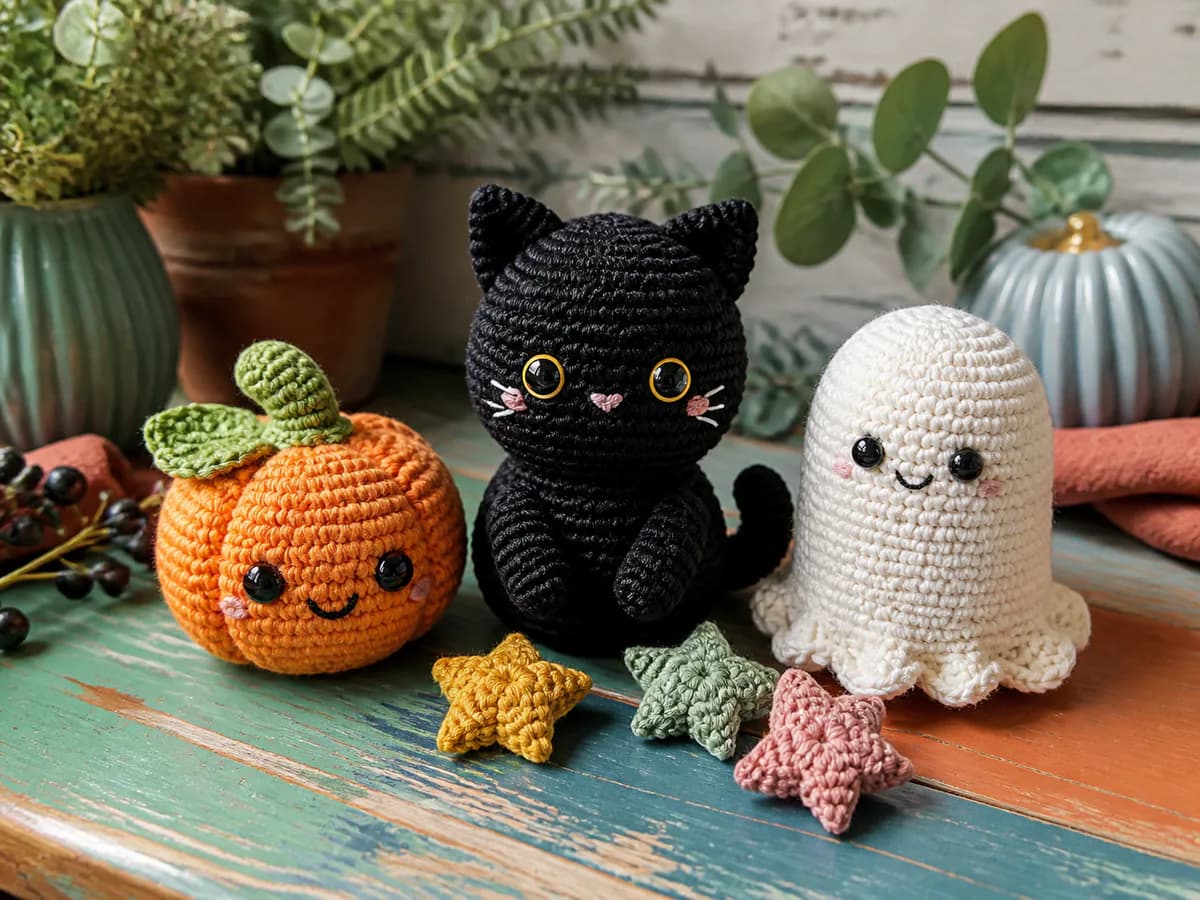
For a wearable version of the pumpkin theme, follow the crochet pumpkin hat pattern with raised ridges. Add another handmade touch to your seasonal display with our Crochet Witch Hat Pattern for Halloween, or make a matching treat carrier with the Halloween crochet candy baskets in pumpkin and black-cat styles.
Keep exploring
For an autumn display, pair your pumpkins with projects from Halloween amigurumi ideas. For the rest of the year, browse seasonal crochet and handmade gifts or use the crochet gift guide to choose a project by occasion.
Essential crochet guides
Maker notes
Questions or finished-project notes?
Share what helped, ask about a step, or leave a thoughtful note for the next maker.
Loading maker notes...