3 Free Crochet Fruit Patterns: Apple, Kiwi & Orange
Make a whole crochet apple and two cut fruit halves: kiwi and orange. Get three free fruit patterns with stitch counts, assembly tips, and diagrams.

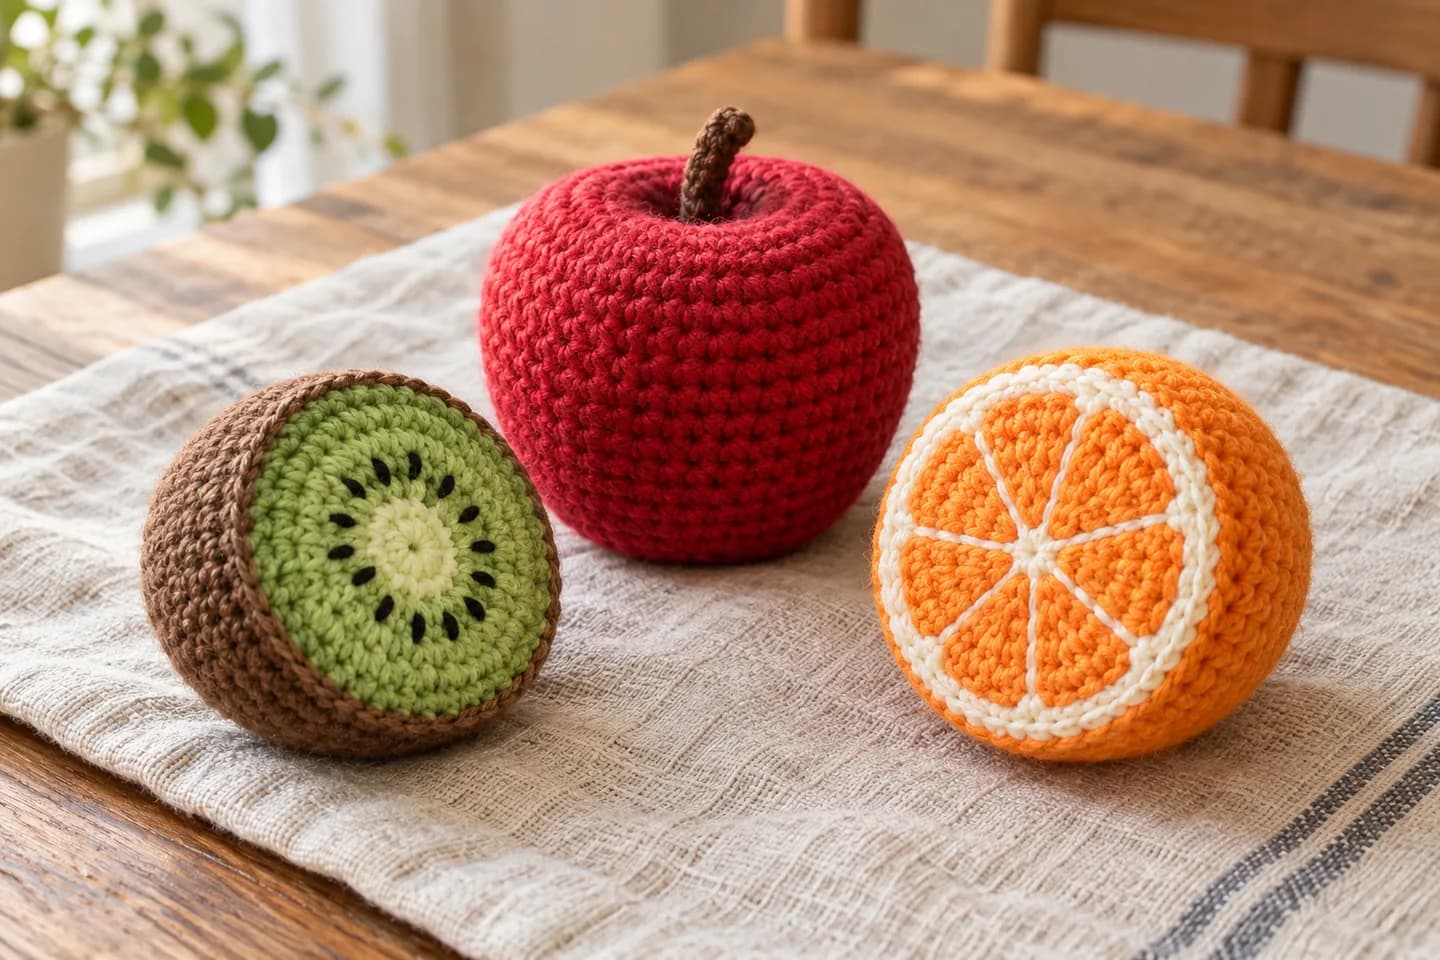
Make a small crochet fruit set with a whole red apple, a kiwi half with stitched seeds, and an orange half with white segment lines. These are three separate free patterns; finish just one, or make the set for a play kitchen or a handmade display. The kiwi and orange are stuffed cut halves, not flat appliqués or whole round fruits.
Jump to a pattern: Apple · Kiwi half · Orange half. Each pattern has its own count check and finishing steps. If this is your first small stuffed project, read our beginner amigurumi guide before starting.
These are original Crochet Nook constructions inspired by the fruit choices and cut-face presentation in Signe Elfriede's Hobbii play-food series. The stitch plans, counts, and teaching notes here are our own. Her apple, kiwi, and orange patterns are also available free at Hobbii if you prefer the designer's versions. The lead image illustrates the shapes described here; it is not a photographed sample of these instructions.
Before you begin
Use smooth fingering-weight cotton and a 2.5 mm hook as a starting point. You need red and a little brown for the apple; cream, light green, black embroidery yarn, and brown for the kiwi; and peach or pale orange, white, and orange for the orange half. Add polyester stuffing, a yarn needle, scissors, and a removable stitch marker. Keep enough yarn from each color until you have finished your first fruit: exact yardage and finished dimensions have not been measured from a completed sample.
Choose a hook that makes tight single-crochet fabric without uncomfortable strain. If stuffing shows between stitches, use a smaller hook or lighter stuffing. If the rounds curl so tightly you cannot work them comfortably, try the next hook size up. Our amigurumi yarn and hook guide explains how yarn texture and hook size affect small toys.
All instructions use US terms. ch = chain; sc = single crochet; sl st = slip stitch; inc = two sc in one stitch; dec = single-crochet decrease over the next two stitches. An invisible decrease works through the front loops of those two stitches and can hide shaping on a stuffed piece. A repeat such as (3 sc, inc) × 8 means work that sequence eight times, using the next stitches each time. The final number in ( ) is the stitch total after the round.
Work each piece in a continuous spiral unless a step says otherwise. Do not join or turn at the end of a round. Move the marker to the first stitch of the new round so you can check the count before continuing. A magic ring can be replaced with ch 2 and the stated starting stitches in the second chain from the hook; close that center carefully. For help reading repeats, use our crochet pattern abbreviation guide.
If these will be play food, embroider details rather than adding loose beads or plastic eyes. Sew the apple stem firmly, bury tails inside, and check the finished pieces for loose attachments before giving them to a child. These patterns have not been assessed against toy-safety standards.
1. Free Crochet Apple Pattern
The apple is one red piece worked from its base toward the top. The final yarn tail draws a shallow dimple into the crown; a short brown stem covers the finishing point. There is no leaf in this design.
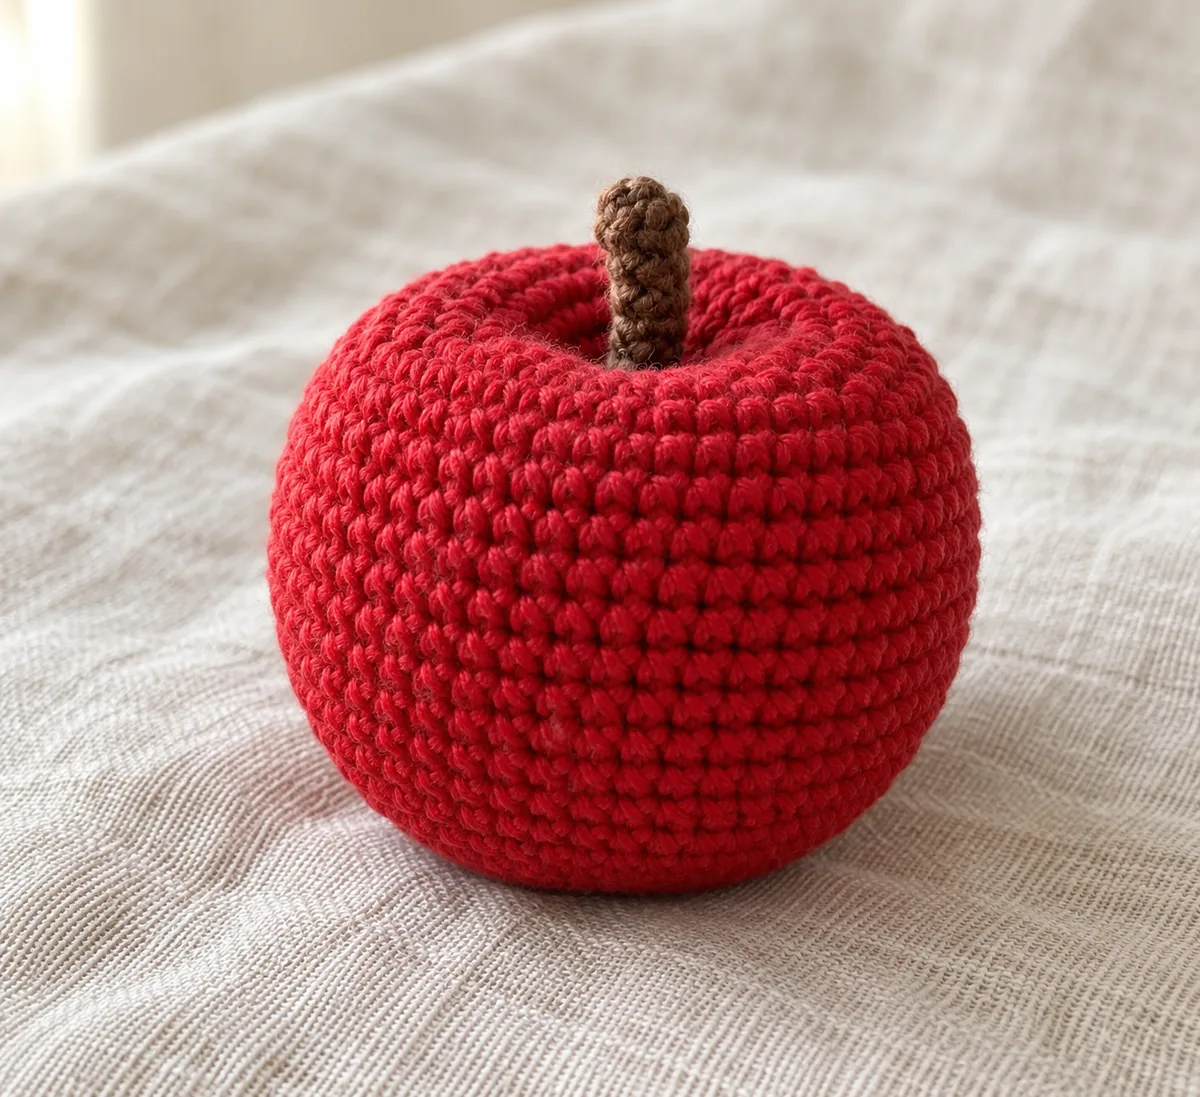
Crochet the red apple
Start with a magic ring in red. Place your marker in the first sc of each round.
Round 1: 8 sc in the ring. (8)
Round 2: Inc in each stitch. (16)
Round 3: (1 sc, inc) × 8. (24)
Round 4: (2 sc, inc) × 8. (32)
Round 5: (3 sc, inc) × 8. (40)
Round 6: (4 sc, inc) × 8. (48)
Rounds 7–9: Sc in every stitch for three rounds. (48 each round)
Round 10: (5 sc, inc) × 8. (56) This adds a little fullness above the base.
Rounds 11–15: Sc in every stitch for five rounds. (56 each round)
Round 16: (5 sc, dec) × 8. (48) Each repeat uses seven old stitches and makes six new ones.
Round 17: (4 sc, dec) × 8. (40)
Round 18: (3 sc, dec) × 8. (32)
Begin stuffing now. Fill the lower and middle body evenly, leaving the top flexible enough to draw inward.
Round 19: (2 sc, dec) × 8. (24)
Round 20: (1 sc, dec) × 8. (16) Add the last small amount of stuffing before the opening becomes narrow.
Round 21: Dec × 8. (8) Cut the yarn with a long tail. Thread it through the front loop of each of the eight remaining stitches in order and pull the opening closed.
| Apple count checkpoint | After the round |
|---|---|
| Increasing base, rounds 1–6 | 8 → 16 → 24 → 32 → 40 → 48 |
| Lower body, rounds 7–9 | 48 each |
| Fullest section, rounds 10–15 | 56 each |
| Top decreases, rounds 16–21 | 48 → 40 → 32 → 24 → 16 → 8 |
Shape the apple and add the stem
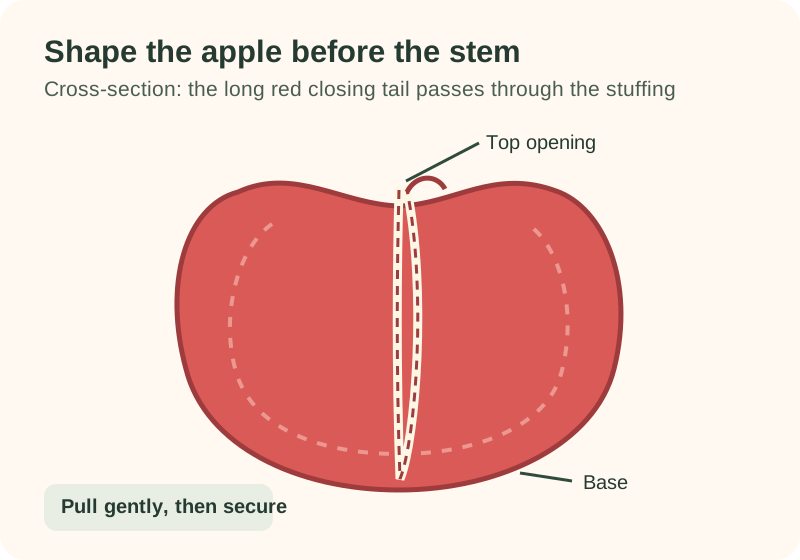
Keep the red closing tail in the needle. Push the needle straight through the center of the stuffed apple and out through the magic-ring center at the base. Re-enter the base about one stitch away and bring the needle back out near the top closure. Pull only until the top dimples slightly; a hard pull can flatten the apple or break the yarn. Secure the tail with a small stitch beside the top opening and bury its end inside.
With brown yarn, ch 6. Starting in the second chain from the hook, work 1 sl st in each of the five chains back to the start. Fasten off with a sewing tail. Fold no part of the stem over; sew its bottom end firmly into the top dimple and hide the tail inside. For play food, pull lightly on the stem to check that it stays attached.
2. Free Crochet Kiwi Half Pattern
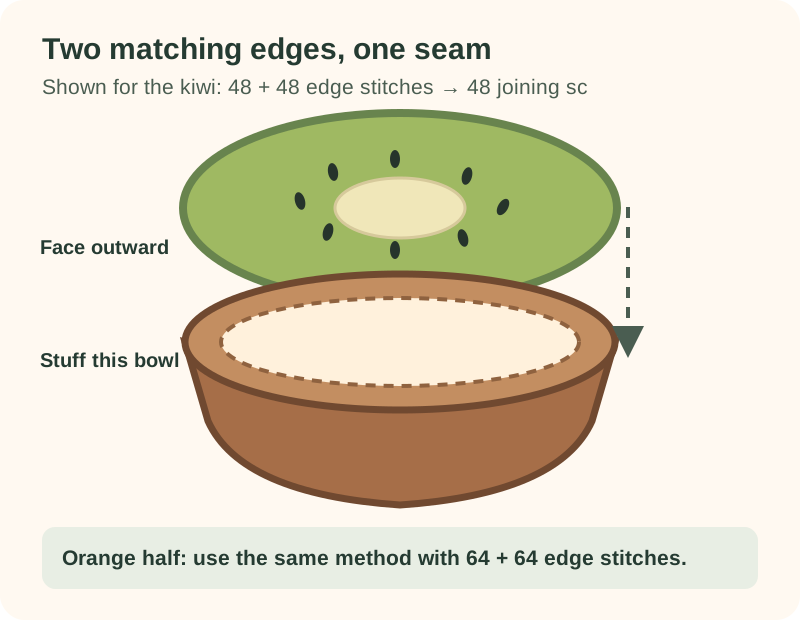
The kiwi has a flat seeded face and a separate brown peel shell. Both open edges contain 48 stitches, so you can join them stitch for stitch. The face starts in cream and changes to green; embroider the seeds before joining, while the back of the face is easy to reach.
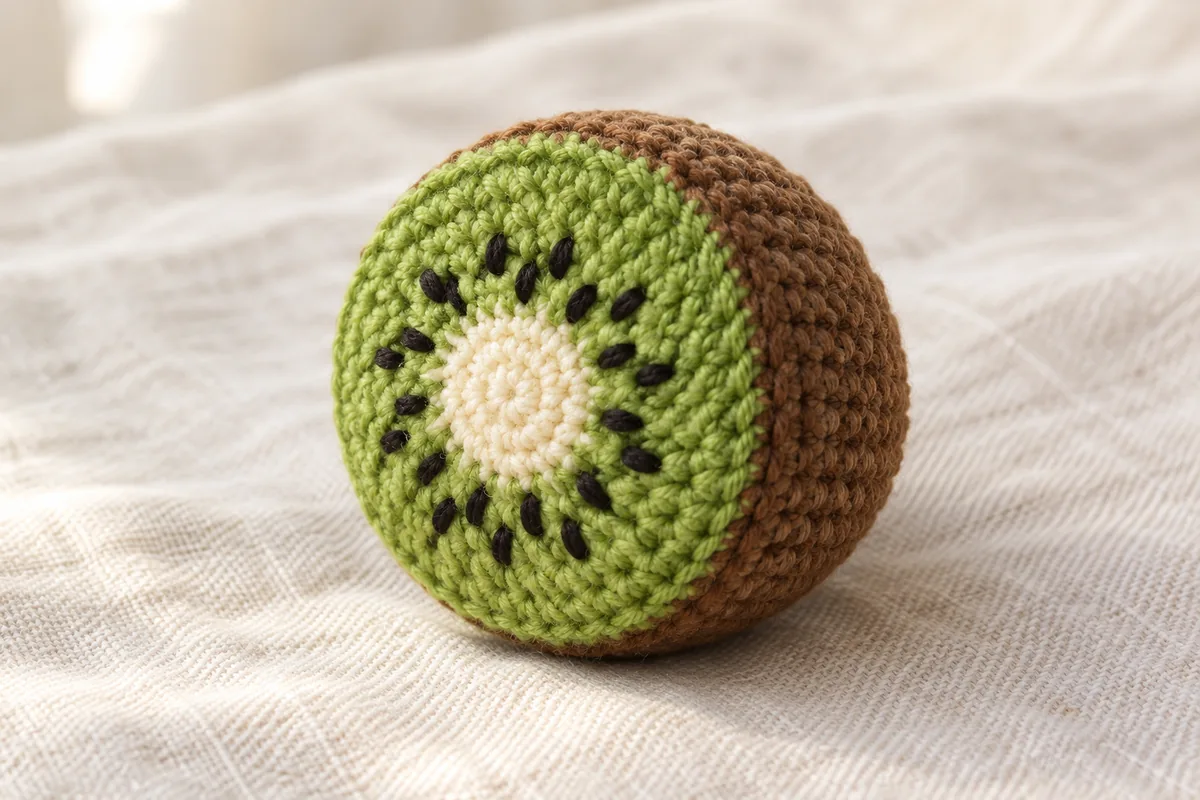
Make the kiwi face
With cream yarn, make a magic ring.
Round 1: 8 sc in the ring. (8)
Round 2: Inc in each stitch. (16) Change to light green in the last yarn-over of the final stitch, so the next round begins cleanly in green.
Round 3: (1 sc, inc) × 8. (24)
Round 4: (2 sc, inc) × 8. (32)
Round 5: (3 sc, inc) × 8. (40)
Round 6: (4 sc, inc) × 8. (48) Fasten off and weave the cream and green tails securely across the wrong side.
With a short length of black embroidery yarn, make eight small seed stitches in the green area just outside the cream center, approximately one per eighth of the circle. If you want a fuller seeded face, add a second, staggered ring of eight seeds farther out. Keep every black stitch on the green face; do not pierce the edge loops needed for assembly. Tie or weave embroidery ends on the wrong side of the disk, where the shell will conceal them.
Make the brown kiwi peel
Start a separate magic ring in brown.
Rounds 1–6: Work the same stitch-count progression as the kiwi face—8, 16, 24, 32, 40, then 48 sc—using brown throughout. Specifically, start 8 sc; inc in every stitch for round 2; then work (1 sc, inc), (2 sc, inc), (3 sc, inc), and (4 sc, inc) eight times in rounds 3–6 respectively.
Rounds 7–11: Sc in every stitch for five complete rounds. (48 each round) Do not fasten off. The brown piece should now resemble a shallow open bowl.
Join and stuff the kiwi
Hold the kiwi face across the bowl opening with its seeded right side facing out. Match the 48 outer stitches of the disk to the 48 open stitches of the shell. Insert your hook through both loops of the next brown stitch and both loops of the corresponding green stitch, then work 1 sc through all four loops. Continue around, pairing one stitch from each edge and working 48 joining sc total. Add modest amounts of stuffing before the opening becomes too small to reach. The face should stay fairly flat rather than bulging like a whole kiwi. Sl st into the first joining sc, fasten off, and bury the tail in the shell. The joining sl st does not count as a 49th joining stitch.
3. Free Crochet Orange Half Pattern
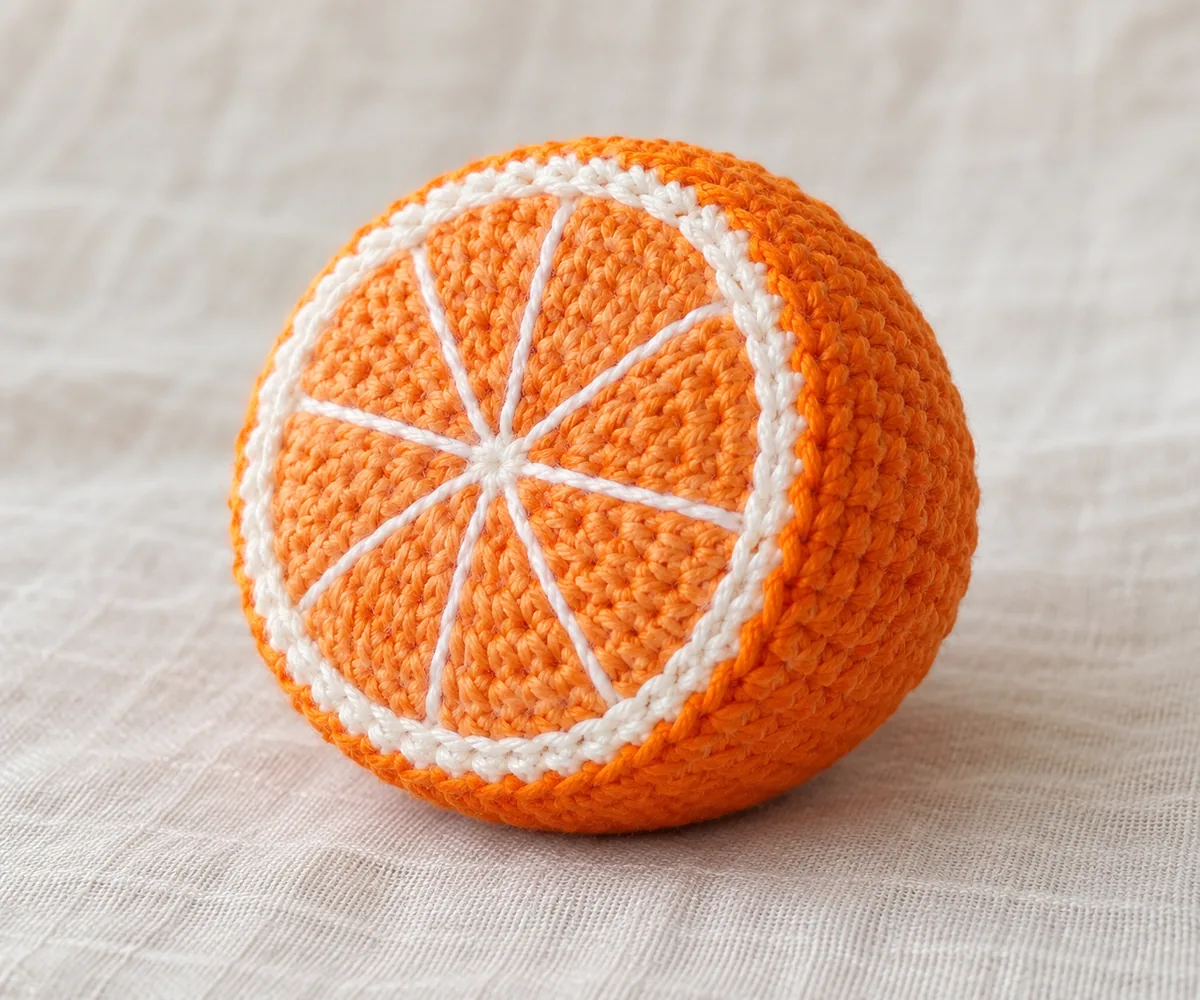
The orange follows the same flat-face plus peel-shell construction as the kiwi, but it is wider: both edges have 64 stitches. White yarn makes a pith ring around the peach-colored face and eight embroidered segment boundaries. This orange half has no stem or leaf.
Make the orange face and segments
With peach or pale orange yarn, make a magic ring.
Round 1: 8 sc in the ring. (8)
Round 2: Inc in every stitch. (16)
Round 3: (1 sc, inc) × 8. (24)
Round 4: (2 sc, inc) × 8. (32)
Round 5: (3 sc, inc) × 8. (40)
Round 6: (4 sc, inc) × 8. (48)
Round 7: (5 sc, inc) × 8. (56)
Round 8: (6 sc, inc) × 8. (64) Change to white in the final yarn-over.
Round 9: Sc in every stitch in white to form the pith ring. (64) Fasten off, preserving the 64 edge loops for joining.
Use white embroidery yarn to stitch eight rays from near the center toward the inner edge of the pith ring. Space their outer endpoints about eight stitches apart around the 64-stitch rim. Lay each ray over the peach surface without pulling it so tightly that the disk puckers. Secure the ends on the back of the disk, away from the joining loops. The pith ring itself stays white and visible after assembly.
Make the orange peel
In orange yarn, start a separate magic ring. Work rounds 1–8 exactly to the stitch totals of the orange face above—8, 16, 24, 32, 40, 48, 56, and 64 sc—but keep the entire piece orange.
Rounds 9–13: Sc in every stitch for five rounds. (64 each round) Keep the yarn attached for assembly.
Place the white-edged face over the open orange shell with the segments showing outward. Match one white edge stitch to one orange edge stitch. Working through both loops of each matched stitch, make 64 joining sc around, adding small amounts of stuffing before closing the last portion. Keep the cut surface flatter than the rounded peel. Sl st into the first joining sc, fasten off, and weave the tail inside. Check that the eight white rays remain visible and that no stuffing can escape at the seam.
| Cut-half count check | Face edge | Shell edge | Joining round |
|---|---|---|---|
| Kiwi half | 48 | 48 | 48 sc |
| Orange half | 64 | 64 | 64 sc |
Tips & troubleshooting
If your crochet fruit looks uneven, check its count and stuffing before changing the next round.
A flat face cups before assembly: Check the increase round where the cupping begins. Both disks add eight stitches per round. If the count is correct but the fabric still cups, your stitches may be especially tight; gently smooth the disk before joining, and change hook size for a new piece if needed.
The joining seam twists: Stop and count both edges. Each shell must meet a disk with exactly the same number of stitches. Place temporary markers at four equally spaced points around each edge, then align the pairs before continuing. Do not skip an edge stitch just to make the last few stitches meet.
Stuffing shows or the face bulges: Put less stuffing near the flat face and move the rest toward the rounded peel. The apple can be firmer, but its top needs enough give for the dimple. If large gaps remain in the stitches, adjust hook size for the next fruit rather than relying on extra stuffing.
Embroidery pulls the disk out of shape: Remove and redo tight stitches before joining the shell. Kiwi seeds should be small surface stitches; orange rays should rest on the surface without drawing the edge inward.
Frequently Asked Questions
Are these crochet fruit patterns beginner friendly?
They suit a confident beginner who can make a magic ring, count continuous rounds, increase, decrease, and sew pieces together. The apple is the simplest starting point because it has no matched-edge seam or face embroidery.
What yarn works best for crochet play food?
Smooth cotton makes the small stitches and embroidery easy to see. Fingering-weight cotton with a 2.5 mm starting hook makes compact pieces, but another smooth yarn can work if you adjust the hook for a firm fabric. A thicker yarn will change the final size.
Can I use leftover yarn?
Yes, if you have enough of each color to complete the matching pieces and the yarns are similar in thickness. Use the same main-yarn weight for a disk and its shell so their edges align evenly. No exact yardage is claimed for these unmeasured samples.
Can I wash the finished fruit?
Follow the care instructions for your chosen yarn and stuffing. Before washing, check that embroidered seeds, segments, and the apple stem are firmly attached. Let the stuffed pieces dry fully, including their centers, before storing them.
Why is the kiwi or orange only a half fruit?
Its colored cut face lets you show kiwi seeds or orange segments clearly. The back is a rounded stuffed shell. For a whole fruit, you would need a different construction; joining two flat faces or treating this shell as a complete sphere would not produce the pictured result.
Keep crocheting
- Want to practice the kiwi seeds or orange segment lines? The amigurumi embroidery guide shows how to place and secure small stitched details on crochet fabric.
- Ready for another small stuffed project? Browse the beginner amigurumi project ideas.
- Making fruit for a child's play kitchen? Read the crochet toy construction and safety guide for help checking seams, attachments, and stuffing.
Essential crochet guides
Maker notes
Questions or finished-project notes?
Share what helped, ask about a step, or leave a thoughtful note for the next maker.
Loading maker notes...