How to Make Amigurumi Faces: Eyes, Noses & Smiles
Learn to place amigurumi faces and embroider eyes, noses, and smiles with clear diagrams, needle steps, symmetry checks, and practical finishing tips.

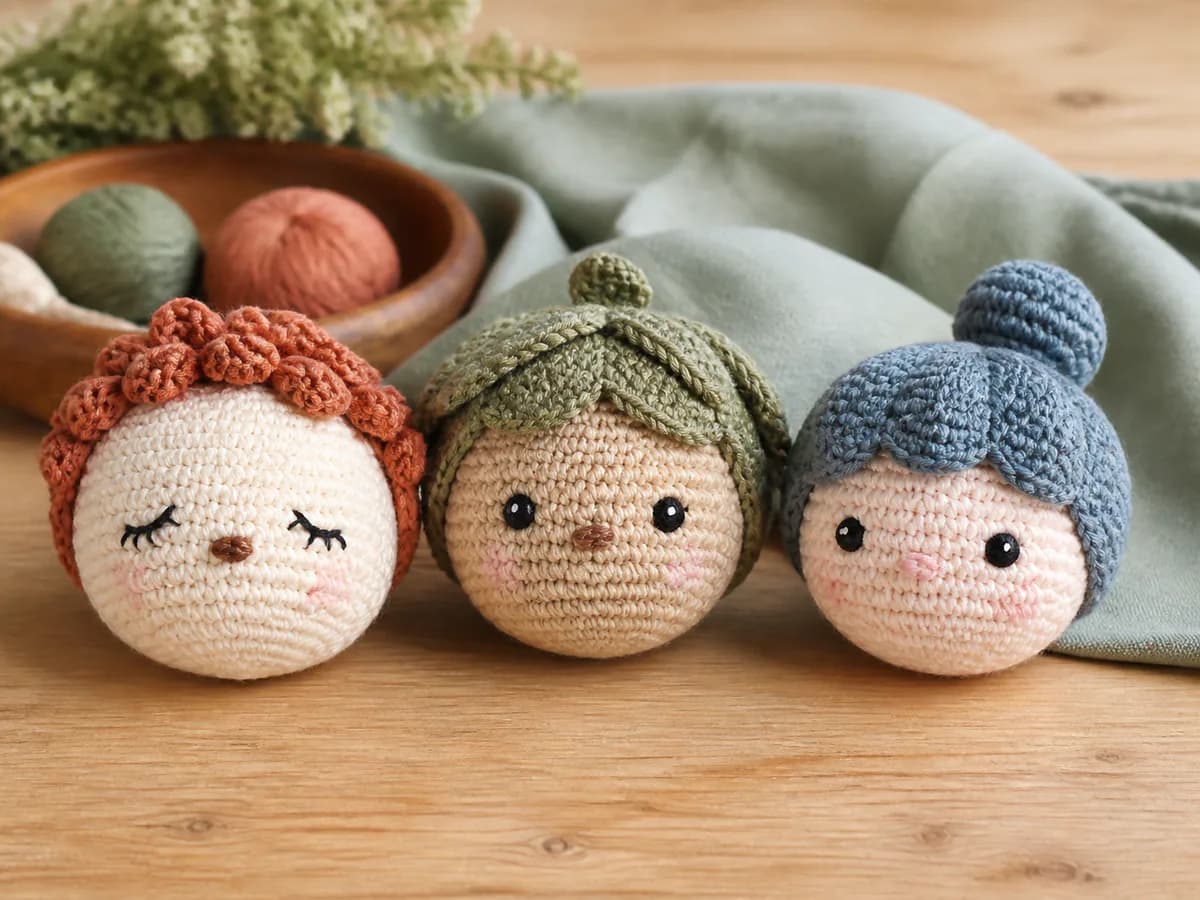
An amigurumi face becomes easier to finish when you separate placement from stitching. First mark the eyes and nose on the shaped head. Then embroider one feature at a time, comparing both sides before securing the yarn.
This guide explains small embroidered eyes, a curved sleepy eye, a filled nose, and a backstitched smile. It is a finishing tutorial for an existing head, not a complete doll pattern. Follow your chosen pattern's face positions when provided; the diagrams explain the method without prescribing one eye spacing for every animal.
Prepare the head and tools
Gather a yarn needle that passes through your fabric without stretching it, smooth embroidery yarn or floss, scissors, and contrasting waste yarn for temporary markers. Follow the head pattern for your crochet hook, yarn, and stuffing. Test the embroidery on spare crochet fabric: a thinner strand often makes a clearer small feature than bulky body yarn.
Shape the head with stuffing but keep the neck or finishing opening accessible. Remove enough filling to reach the inside when securing ends, then replace it evenly. A hollow shell is difficult to judge, while a completely closed head makes secure finishing harder for a beginner.
If the animal has a separate muzzle, hold or baste it in place before choosing the eye positions. PlanetJune's eye-placement tutorial illustrates how those features work together. Do not assume the start-of-round marker is the front center: use the shape and its intended body orientation.
Map the face before sewing
Lay a removable strand down the intended front center. Mark both eye centers equally far from that line, then mark the inner and outer endpoints if you want curved eyes. View the face straight on and from each side, with any muzzle, ears, or hair held in place.
| Measurement | What to compare |
|---|---|
| Center offset | Distance from the face center line to each eye center |
| Eye width | Span between the inner and outer ends of one eye |
| Inner gap | Space between the nearest edges of the two eyes |
A count measured between eye centers is different from a count measured between their nearest edges. Confirm which points a designer means before copying an eye-spacing instruction. Continuous rounds also slope slightly: check the visual height of the markers instead of relying only on round numbers.
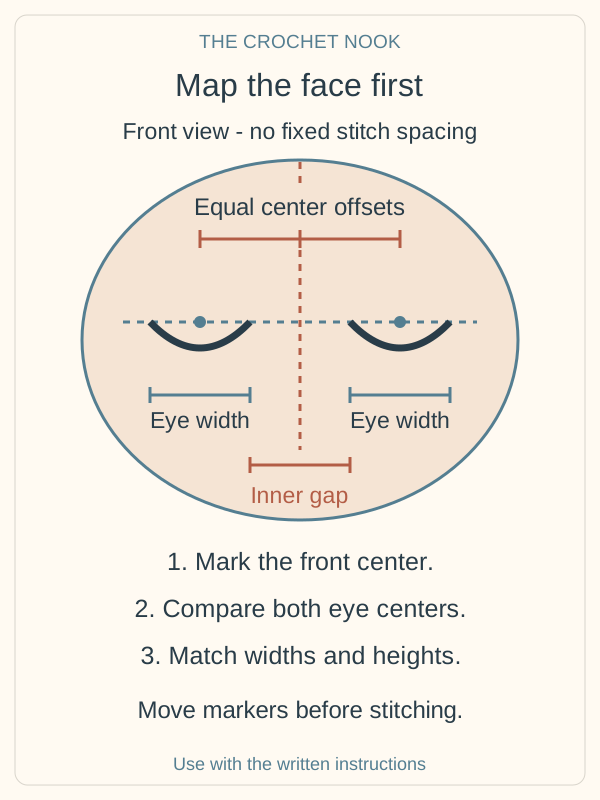
The diagram is a front-view placement map, not a numbered crochet chart. Keep the markers removable until the expression looks right. Photograph the head at eye level if holding it makes symmetry hard to judge; check that it is not tilted or unevenly stuffed first.
Anchor the embroidery inside
Leave a starting tail long enough to handle comfortably. Through the open neck, weave it under several stitches on the inside of the crochet fabric, change direction, and weave through neighboring stitches. Keep the anchor away from the visible face and avoid tightening the fabric. Bring the working end out at your first embroidery point.
Secure the finishing tail through inside fabric in the same way and check that gentle tension does not slide the feature loose. If your project calls for an internal knot, weave its tails as well. Pushing a loose tail into stuffing hides it but does not anchor it.
Keep the inside accessible until both eyes and the mouth are secure. For a closed head, carefully reopening the final closure may be easier than trying to finish through the surface; do not cut a new hole into the head. Guide dark thread near the embroidered feature so it does not show through a pale forehead.
Embroider small oval eyes
Start with a narrow practice eye on spare fabric. A compact eye uses neighboring short stitches; repeatedly piling yarn into one hole can make a hard lump.
- Mark the top and bottom of one eye. Their distance sets its height, not the spacing between the two eyes.
- Bring the needle out at the top point and back inside at the bottom point, laying one vertical strand on the surface.
- Come out just beside the first top point and return beside the first bottom point. Place this pass alongside the first.
- Add neighboring passes until the background is covered. Shorter passes at the sides create a rounded outline; stop before the fabric puckers.
- Match the second eye's height, width, and position, then secure the ends inside. A tiny highlight is optional and needs its own secure finishing.
If a pass disappears into a gap, try a fuller strand or a firmer entry point rather than pulling harder. Nicole Chase's amigurumi embroidery videos show eyes and other facial details in motion if you prefer watching the needle work.
Make a curved sleepy eye
Use couching to hold a curved strand against the surface. The Royal School of Needlework's couching demonstration explains the basic stitch.
- Mark endpoints A and B. Bring the main yarn up at A and down at B, leaving enough ease for a shallow downward curve.
- Arrange the lowest point at C. With a separate matching finer strand, come up just above the curve and go down just below it. The tiny tack crosses over the main yarn.
- Use distinct entry and exit points so the tack catches the strand. Add another tack if needed, then secure both yarns inside.
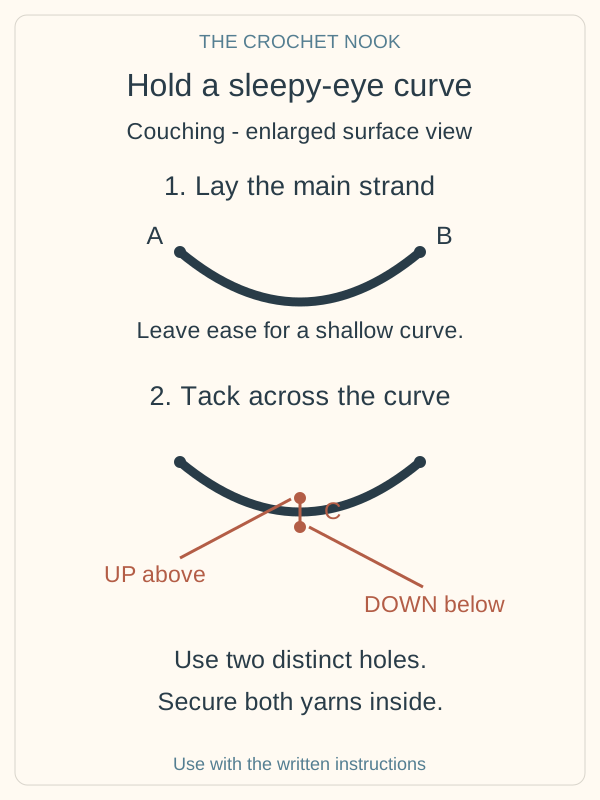
Mirror the curve on the other eye. Optional eyelashes are separate short straight stitches near the outer end, not loose loops. Contrasting colors in the diagram distinguish the main strand from the tack; matching yarn makes the tack less visible on your project.
Add a nose and smile
A small filled nose
Mark an oval or triangle centered between the eyes and below their line, allowing for any muzzle. Begin smaller than you think you need: an oversized nose can crowd an otherwise balanced face.
Cover the shape with short parallel passes from one edge to the opposite edge. Place each beside the previous pass and vary its length to follow the outline. For a triangle, shorten the stitches toward its tip. Keep the fabric relaxed and stop once the background is covered rather than stacking a thick lump of yarn.
A backstitched smile
Mark a short mouth line. Imagine points A, B, C, D in order along it, separated by short stitch lengths. Come up at B and down at A; come up at C and down at B; then come up at D and down at C. Each new visible stitch meets the previous one.
Follow a curve with small segments rather than stretching one strand across the whole mouth. The RSN backstitch tutorial demonstrates this movement. For an animal mouth, a short vertical line below the nose can meet two small curved branches; make both branches start at the same point.
Eye indentation, safety eyes, and joints
Indentation is optional sculpting, not a correction for misplaced eyes. It changes the head's shape through tension. Follow your specific toy pattern's anchoring points and needle path if it uses sculpting. A generic pull between both eyes can pinch the nose bridge or leave one eye deeper; for a first face, surface embroidery is easier to assess and undo.
Plastic safety eyes and safety joints are different components. An eye has an outside face and an inside retaining part; a joint connects movable pieces. Their names do not certify the finished toy as suitable for a child.
- Choose hardware before closing the head or body, while the inside is accessible.
- Use the exact compatible components and installation instructions from the hardware manufacturer and toy pattern. Washer orientation and joint assembly are not universal.
- Do not replace missing washers with glue, force mismatched components together, or treat a hand tug as safety certification.
- If a pattern does not include joints, use its sewn attachment method instead. This guide does not offer an untested conversion to movable limbs.
For items intended for children under three, choose embroidered features rather than small plastic eyes, noses, buttons, or joint hardware, and assess the whole toy. CPSC guidance advises keeping toys with small parts away from children younger than three. Embroidery still needs secure finishing; it does not by itself establish toy-safety compliance. Our baby-toy construction guide covers seams and attachments.
Tips & troubleshooting
| Problem | What to check | Next step |
|---|---|---|
| One eye looks higher | Tilt, uneven stuffing, sloping rounds | Shape the head and compare it straight on before moving markers |
| Face looks cross-eyed | Inner gap relative to eye width | Move temporary markers before stitching |
| Dark thread disappears | Fine thread or open entry points | Test a fuller strand and firmer stitch endpoints |
| Fabric puckers | Embroidery tension | Loosen the last pass and lay thread gently on the surface |
| Sleepy eye straightens | Missing holding stitch | Add the small tack shown in the diagram |
| Eye becomes bulky | Passes stacked in one hole | Use adjacent passes; stop once the background is covered |
| Dark yarn shows through | Long internal route behind pale fabric | Reroute near the feature and check stuffing coverage |
| Ends work loose | Tails hidden only in stuffing | Secure them through inside fabric before closing |
Remove all temporary markers before finishing. After replacing the stuffing, look at the face again because the expression can change with the head's firmness. Recheck details after washing or wear. For problems with the underlying fabric, see our common crochet mistakes guide.
Frequently Asked Questions
How many stitches apart should the eyes be?
Follow the head pattern when it gives a placement. Otherwise, compare removable markers, eye widths, and the inner gap on your actual head. A count taken from another head size is not a universal formula.
Should I embroider before or after stuffing?
Shape the head with stuffing so you can judge placement, but leave an opening to secure the ends. Remove and replace enough filling to reach the inside fabric. Install hardware at the stage specified by its pattern before closing access.
Can I use the body yarn for the face?
Yes, if it makes a neat feature at that scale. Bulky or fluffy yarn may obscure small details, so test smoother yarn or floss on spare fabric first.
Do I need plastic eyes or needle sculpting?
No. Embroidered eyes, a nose, and a simple mouth can create a complete expression. Hardware and sculpting are separate choices.
Is there a pattern for the heads in the image?
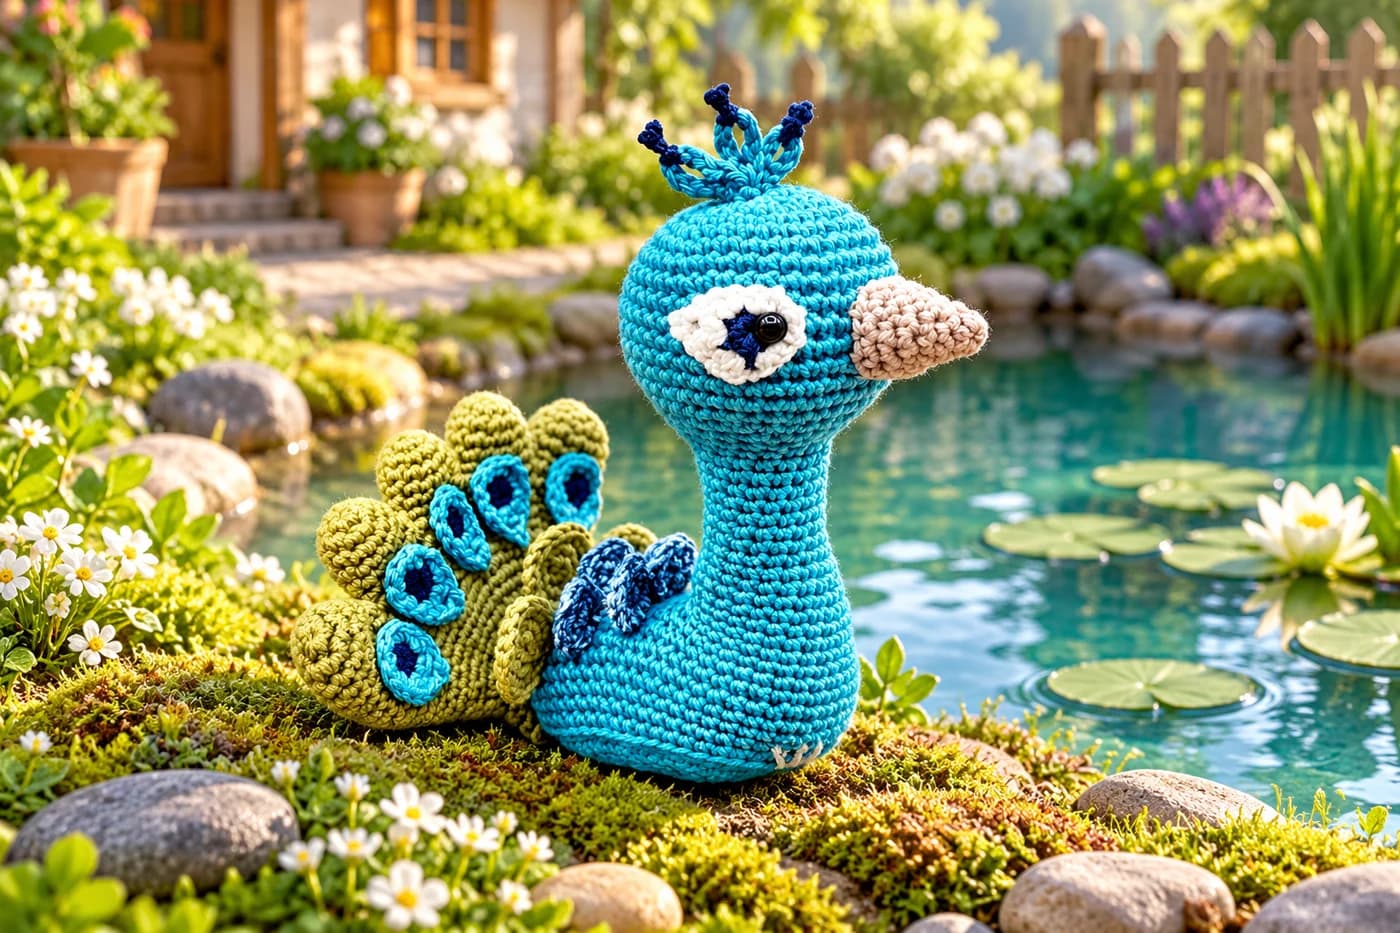
The image shows facial styles, while this page teaches placement and embroidery on your own crochet head. Try our panda amigurumi pattern if you need complete head and body instructions, or browse the crochet animal ideas for designer patterns.
Essential crochet guides
Maker notes
Questions or finished-project notes?
Share what helped, ask about a step, or leave a thoughtful note for the next maker.
Loading maker notes...