10 Free Crochet Christmas Ornament Patterns for Beginners
Make 10 free crochet Christmas ornaments with counted beginner patterns for a star, stocking, bauble, tree, wreath, bell, snowflake, and more.

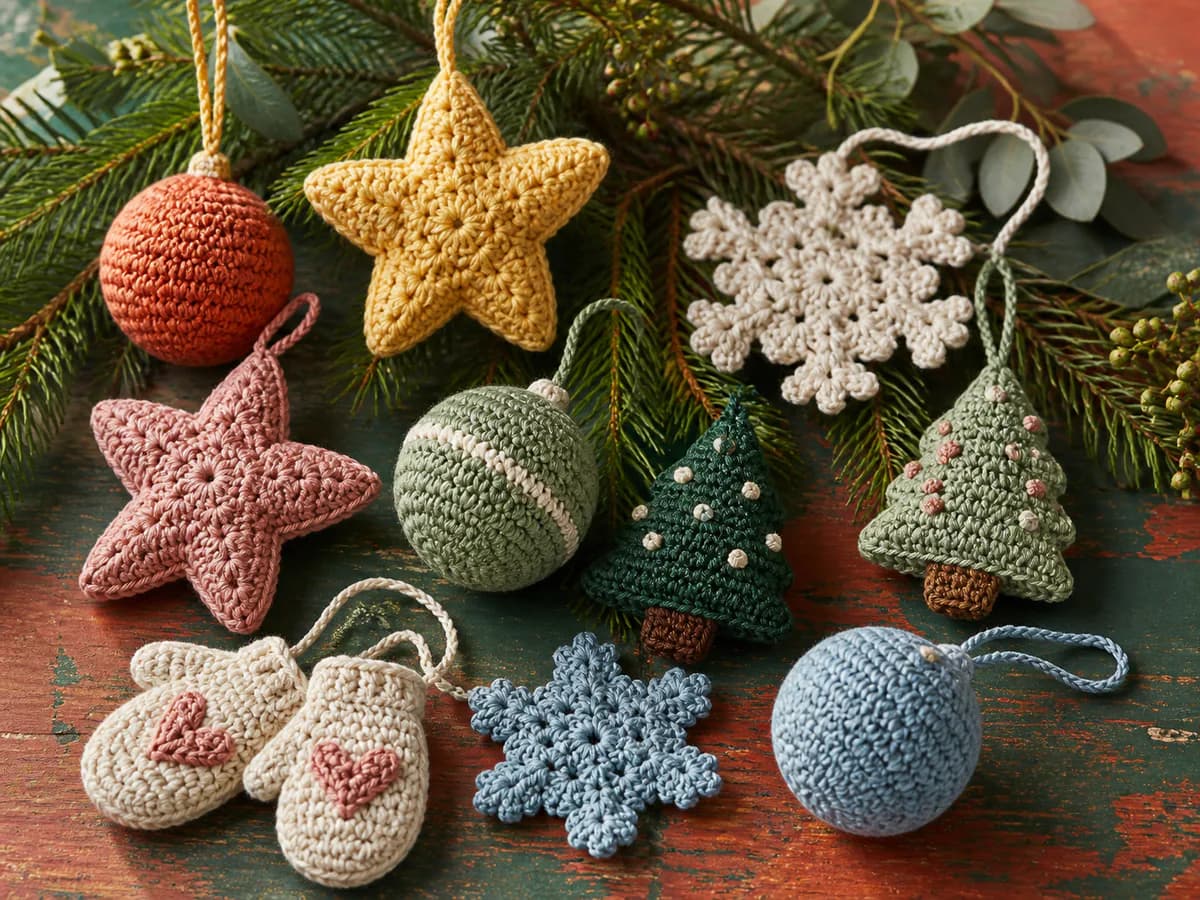
This set contains ten complete free crochet Christmas ornament patterns, not just project ideas. Each ornament uses a small amount of yarn, a secure hanging loop, and countable rows or rounds that can be checked before finishing.
Choose your ornament
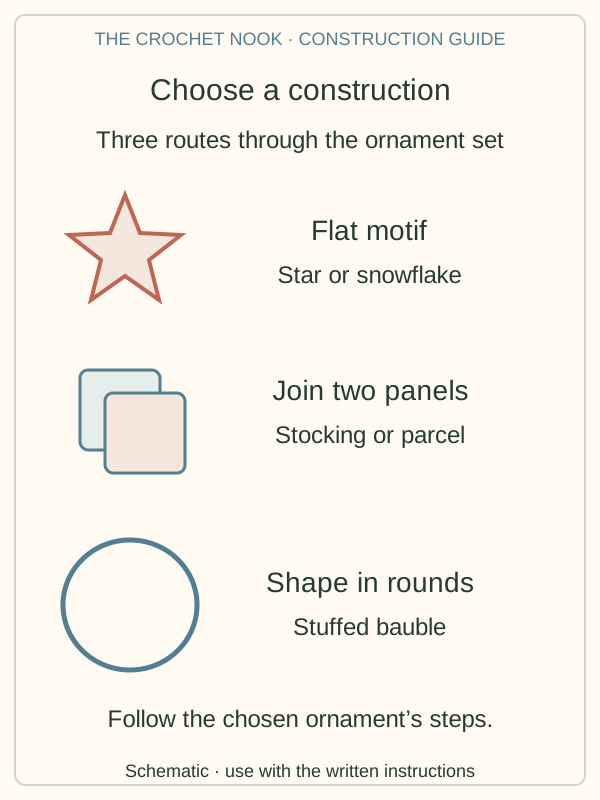
Choose a name below to jump to its instructions. Sizes and working times are provisional planning estimates, not measurements or timings from completed samples. Allow extra time for learning stitches, sewing, and drying blocked motifs.
| Pattern | Construction | Estimated size | Estimated working time |
|---|---|---|---|
| Five-point star | One flat motif | 10 cm across | 30 minutes |
| Mini stocking | Two joined panels | 9 x 7 cm | 60 minutes |
| Stuffed bauble | Worked in continuous rounds | 7 cm diameter | 60-90 minutes |
| Mini tree | Cone, base, and trunk | 10 cm tall | 90 minutes |
| Gingerbread figure | Six small stuffed pieces | 12 cm tall | 2 hours |
| Soft wreath | Seamed ribbed tube | 9 cm across | 60-90 minutes |
| Flared bell | Worked top down | 7 cm tall | 45 minutes |
| Twisted candy cane | Two spiral cords | 11 cm tall | 30 minutes |
| Gift parcel | Two joined squares | 7 cm square | 45 minutes |
| Six-point snowflake | One blocked motif | 10 cm across | 30 minutes |
Materials and supplies
- DK or light worsted-weight scrap yarn in project colors
- 3-4 mm crochet hook; use the smaller hook if stuffing shows between stitches
- Yarn needle, scissors, removable stitch marker, and rustproof pins
- Small amount of washable polyester stuffing for the bauble, tree, figure, wreath, bell clapper, and parcel
- Optional blocking mat
There is no measured sample gauge for these ornaments. The size estimates assume DK yarn and a 3.5 mm hook, but your yarn, tension, stuffing, and blocking will affect the result. Aim for firm fabric that contains any stuffing, and measure your first finished ornament before planning a matching set.
Crochet terms and pattern notes
These patterns use US terms: ch (chain), sl st (slip stitch), sc (single crochet), hdc (half double crochet), dc (double crochet), inc (two sc in one stitch), dec (single crochet two stitches together), BLO (back loop only), MR (magic ring), and FO (fasten off). Turning chains do not count as stitches. Joined rounds say when to slip stitch; all other rounds are worked continuously with a marker in the first stitch.
1. Flat five-point star
Use gold, cream, or any high-contrast color. The planning estimate is about 10 cm across; measure after blocking rather than treating that size as a tested result.
Round 1: Make an MR, ch 1, work 10 sc into the ring, and sl st to the first sc. Pull the ring closed. (10)
Round 2: Repeat the following point 5 times: ch 5; starting in the second ch from the hook, work sl st, sc, hdc, and dc along the chain; skip the next sc from round 1; sl st in the following sc. After the fifth point, FO and weave in the tail.
For the hanger, pass the yarn under two adjacent chain loops at the tip of one point, ch 18, and sl st back through both loops. Knot the two tails together on the wrong side and weave them in opposite directions.
2. Mini striped stocking
Make two identical panels. Change color after any even-numbered row for narrow stripes.
Panel row 1: Ch 8. Sc in the second ch from the hook and across. (7)
Rows 2-8: Ch 1, turn, sc across. (7)
Row 9: Ch 6, turn, sc in the second ch from the hook and in the next 4 chains, then sc across the 7 stitches from row 8. (12)
Rows 10-12: Ch 1, turn, sc across. (12)
Row 13: Ch 1, turn, dec, sc 8, dec. (10)
Row 14: Ch 1, turn, dec, sc 6, dec. (8) FO.
Place the panels directly together with their toes pointing in the same direction, and tuck all color-change tails between the layers. Join yarn at one top corner and sc through both layers around the side, toe, sole, and opposite side, leaving the top open. Join a contrast color at the opening and sc once in each top-edge stitch for 14 sc; work one more round of 14 sc in BLO. Ch 16 at the back seam and sl st into the neighboring stitch for the hanging loop.
3. Classic stuffed bauble
Use one color or change color between complete rounds. Stuff firmly enough to hold a sphere without stretching the stitches apart.
Round 1: Work 6 sc in an MR. (6)
Round 2: Inc 6 times. (12)
Round 3: Repeat (sc, inc) 6 times. (18)
Round 4: Repeat (2 sc, inc) 6 times. (24)
Round 5: Repeat (3 sc, inc) 6 times. (30)
Rounds 6-10: Sc around. (30)
Round 11: Repeat (3 sc, dec) 6 times. (24)
Round 12: Repeat (2 sc, dec) 6 times. (18)
Round 13: Repeat (sc, dec) 6 times. (12) Stuff the bauble.
Round 14: Dec 6 times. (6) FO, thread the tail through the front loops, pull closed, and secure.
For the cap, use a contrast color and work 6 sc in an MR. Work 1 round of 6 sc in BLO, FO with a long tail, and sew the open edge over the bauble closure. Pass an 18-chain loop through opposite sides of the cap so the load is shared by several stitches.
4. Mini cone Christmas tree
The tree is worked from the tip downward. Add embroidered knots only after the cone is complete.
Round 1: Work 6 sc in an MR. (6)
Round 2: Sc around. (6)
Round 3: Repeat (sc, inc) 3 times. (9)
Round 4: Sc around. (9)
Round 5: Repeat (2 sc, inc) 3 times. (12)
Round 6: Sc around. (12)
Round 7: Repeat (3 sc, inc) 3 times. (15)
Round 8: Sc around. (15)
Round 9: Repeat (4 sc, inc) 3 times. (18)
Round 10: Sc around. (18)
Round 11: Repeat (5 sc, inc) 3 times. (21)
Rounds 12-13: Sc around. (21) FO and lightly stuff.
Base: Work 6 sc in an MR, inc 6 times (12), repeat (sc, inc) 6 times (18), then repeat (5 sc, inc) 3 times (21). FO with a long tail and sew the base to the cone, adding the last stuffing before closing.
Trunk: With brown, work 6 sc in an MR and sc around for 3 more rounds. (6) Lightly stuff, flatten the open edge, and sew it to the center of the base. Add an 18-chain loop through both sides of the top two rounds.
5. Mini gingerbread figure
Use brown for every piece and embroider the face and icing with yarn. Avoid glued buttons or beads on ornaments used around children or pets.
Head round 1: Work 6 sc in an MR. (6) Round 2: Inc 6 times. (12) Round 3: Repeat (sc, inc) 6 times. (18) Round 4: Repeat (2 sc, inc) 6 times. (24) Rounds 5-7: Sc around. (24) Round 8: Repeat (2 sc, dec) 6 times. (18) Round 9: Repeat (sc, dec) 6 times. (12) Stuff. Round 10: Dec 6 times. (6) Close and FO with a long sewing tail.
Body round 1: Work 6 sc in an MR. (6) Round 2: Inc 6 times. (12) Round 3: Repeat (sc, inc) 6 times. (18) Rounds 4-5: Sc around. (18) Round 6: Repeat (sc, dec) 6 times. (12) Rounds 7-9: Sc around. (12) Stuff and FO with a long tail.
Arms and legs: Make 4. Work 6 sc in an MR, then work 4 rounds even at 6. Lightly stuff only the first 2 rounds, flatten the opening, and sc through both layers for 3 stitches. FO with a sewing tail.
Sew the head to the 12-stitch top of the body. Sew the arms one round below the neck and the legs evenly under the body. Embroider eyes, a mouth, three icing buttons, and short icing lines at the hands and feet. Pass the hanging loop through the head and one round below the crown so it cannot pull through a single stitch.
6. Soft ribbed wreath
This wreath needs no plastic or metal ring. The ribbed rectangle becomes a lightly stuffed tube.
Row 1: Ch 10. Sc in the second ch from the hook and across. (9)
Rows 2-32: Ch 1, turn, sc in BLO across. (9) FO with a tail at least three times the rectangle length.
Fold the rectangle lengthwise with wrong sides together. Whipstitch the long edges, adding a narrow line of stuffing as the seam advances. Curve the tube into a ring and sew the short ends together, matching all 9 stitches.
Bow: Ch 10. Sc in the second ch and across for 9 stitches. Work 3 more rows of 9 sc. FO, pinch the center, wrap it firmly 8-10 times with a separate strand, and secure on the back. Sew the bow over the wreath join. Add a 20-chain loop through both layers at the top.
7. Flared Christmas bell
Work from the closed crown toward the rim. The final two increase rounds create the bell flare.
Round 1: Work 6 sc in an MR. (6)
Round 2: Inc 6 times. (12)
Round 3: Repeat (sc, inc) 6 times. (18)
Rounds 4-7: Sc around. (18)
Round 8: Repeat (2 sc, inc) 6 times. (24)
Round 9: Repeat (3 sc, inc) 6 times. (30)
Round 10: Sc around. (30) Sl st in the next stitch and FO.
For a soft clapper, work 6 sc in an MR, work one round even at 6, add a pinch of stuffing, and close with 3 decreases. Leave a long tail. Pass the tail up through the center of the bell and out through the MR, positioning the clapper just below the rim; knot securely at the crown and weave in the tail. Join a separate strand through two neighboring crown stitches, ch 18, and sl st through both stitches to form the hanging loop.
8. No-wire striped candy cane
Two crocheted spiral cords form the stripes; hidden sewing stitches help shape the top bend. How well the curve holds depends on yarn, tension, and where you tack the cords together. This no-wire construction has not been verified with a physical sample.
Red cord: Ch 32. Work 2 sc in the second ch from the hook and 2 sc in every remaining chain. (62) FO with a long tail.
White cord: Repeat the red cord instructions. (62)
Align the starting ends and sew them together. Twist the two spirals around each other, then use the long tails to tack the cords together after every fourth curl. Bend the top third into a hook and tack adjacent curls together along the inside of the bend. Hang it briefly to check the shape, then adjust or add tacking stitches where the curve opens. Avoid tightening so much that the cords flatten. Add a 14-chain loop behind the top bend. Do not insert craft wire if the ornament will be handled by children or pets.
9. Mini gift parcel
Make two solid squares in the parcel color.
Row 1: Ch 11. Sc in the second ch from the hook and across. (10)
Rows 2-10: Ch 1, turn, sc across. (10) FO after row 10.
Place the squares together. Join contrast yarn at a corner and sc through both layers around three sides, working (sc, ch 1, sc) in each corner. Add a thin, even layer of stuffing, then close the fourth side in the same way. Surface stitch one vertical and one horizontal ribbon line across the front. Tie or crochet a small bow and sew through both the bow center and parcel fabric several times. Add an 18-chain loop at the upper back corner.
10. Six-point snowflake medallion
Smooth cotton or cotton-blend yarn gives the points the clearest shape. Join each round unless the instructions say otherwise.
Round 1: Make an MR, ch 1, work 12 sc into the ring, and sl st to the first sc. (12)
Round 2: Ch 1. Repeat (sc in the next sc, ch 5, skip the next sc) 6 times. Sl st to the first sc. (6 ch-5 spaces)
Round 3: Sl st into the first ch-5 space. In each of the 6 spaces, work (sc, ch 3, sc, ch 5, sc, ch 3, sc). Sl st to the first sc and FO. (6 long points and 12 short points)
Wet-block the snowflake on a rustproof surface. Pin all 6 long points to the same radius, then pin the 12 short points between them. Let it dry completely and attach a hanging thread through one long ch-5 point.
Finishing and hanging safely
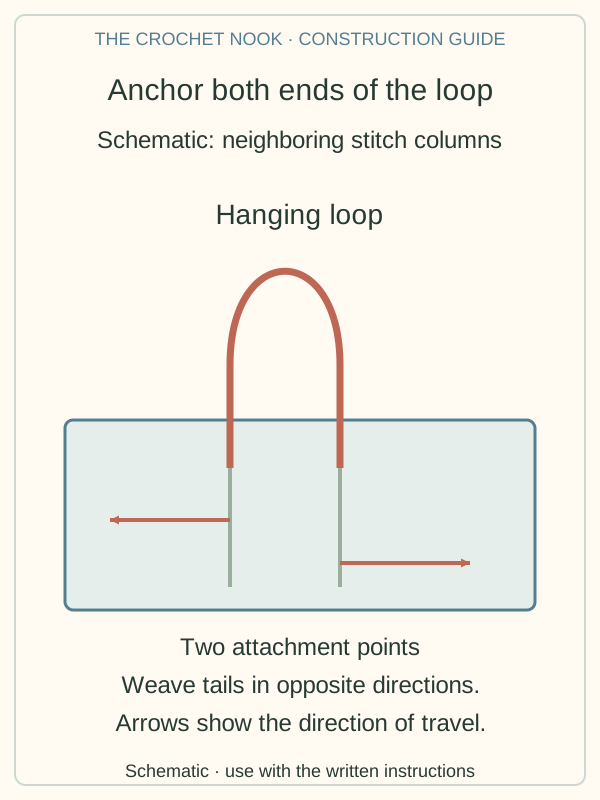
- Reinforce every hanging loop through two neighboring stitches or both layers of a flat ornament.
- Keep ornaments, yarn loops, and stuffing away from candles, heaters, and open flames.
- Use embroidered details instead of glued pieces when children or pets may reach the tree.
- Check the loop, seams, and attachments before rehanging ornaments each year.
- Store flat motifs with tissue between them and reshape stuffed ornaments before use.
Tips & troubleshooting
My stuffed ornament has visible gaps
Move down 0.5 mm in hook size before changing the stitch counts. Stuff in small pieces and stop when the shape is full but the fabric is not stretched.
My flat star or snowflake curls
First recount every repeat. If the count is correct, wet-block the motif and pin matching points at equal distances from the center until completely dry.
My hanging loop leans to one side
Remove the loop and mark the visual center before reattaching it. Pass the hanger through two neighboring stitch columns or both panel layers so the weight is distributed evenly.
How do I make a coordinated set?
Choose three colors and repeat them across different shapes. Use the same yarn weight and hook so the ornaments look related even when their constructions differ.
Frequently Asked Questions
Are these complete free crochet Christmas ornament patterns?
Yes. Each project includes written rows or rounds, stitch counts, assembly, and a hanging method. The instructions have been reviewed on paper; the listed sizes and times are provisional estimates, and completed samples have not been measured.
Which ornament is easiest for a beginner?
Start with the gift parcel, star, or snowflake if you prefer working flat. Choose the bauble after you can work single crochet, increases, and decreases in continuous rounds.
Can I use worsted-weight yarn?
Yes. Use a hook that creates firm fabric and expect a larger ornament. Keep the written stitch counts unchanged unless you intentionally want to redesign the proportions.
May I sell finished ornaments made from these patterns?
Small-scale sales of finished ornaments are allowed with credit to The Crochet Nook. Do not copy, sell, or republish the written instructions or site images.
Keep exploring
Plan more seasonal projects with the Crochet Gift Guide, make a ribbed crochet pumpkin, or browse seasonal crochet patterns and gift ideas. For every category in one place, visit the Free Crochet Pattern Library.
Essential crochet guides
Maker notes
Questions or finished-project notes?
Share what helped, ask about a step, or leave a thoughtful note for the next maker.
Loading maker notes...