How to Line and Add Hardware to a Crochet Bag
A step-by-step bag-finishing tutorial for drafting a lining, adding pockets and interfacing, installing closures, and reinforcing rings or straps.

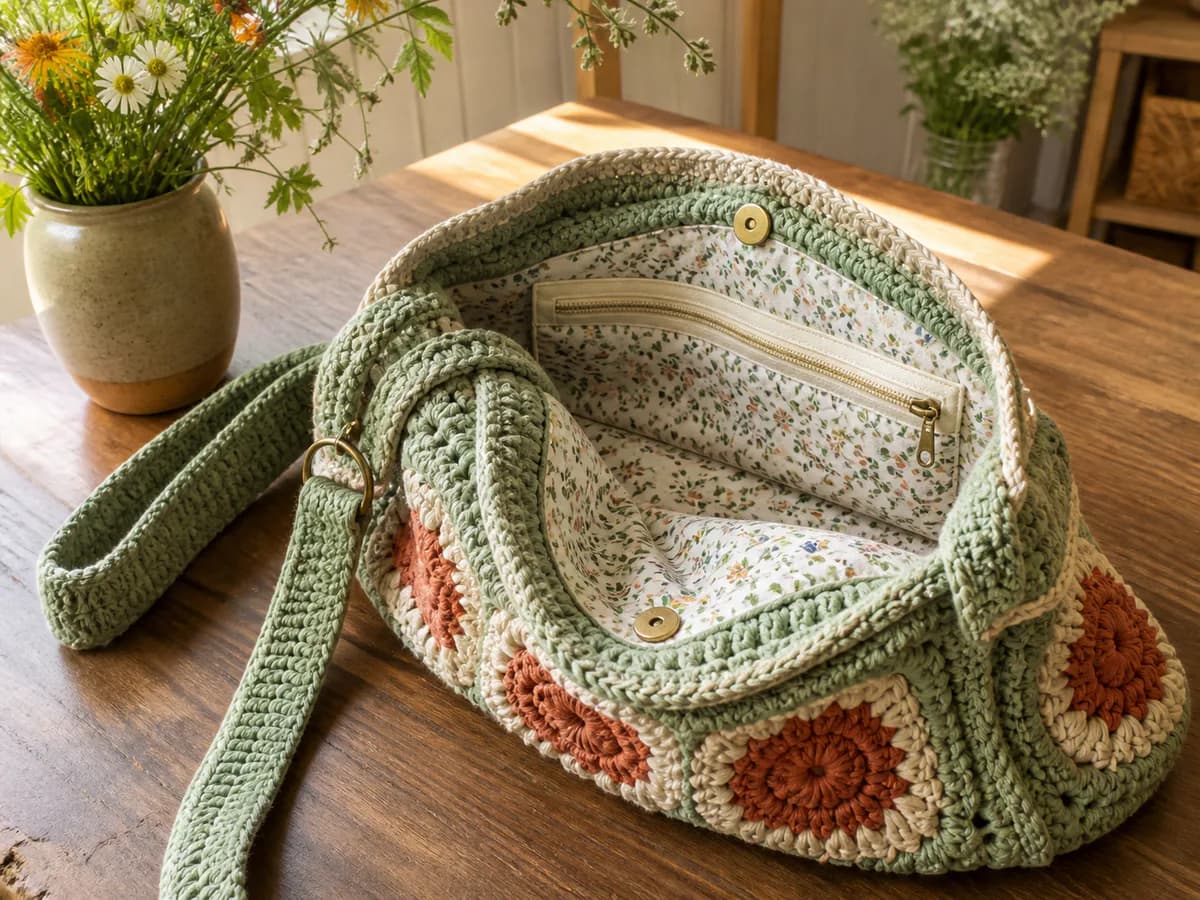
A step-by-step bag-finishing tutorial for drafting a lining, adding pockets and interfacing, installing closures, and reinforcing rings or straps.
Materials and supplies
- Firm worsted cotton or cotton blend
- 4-5 mm hook
- Locking stitch markers
- Yarn needle and sharp scissors
- Lining fabric, sewing thread, clips, and chosen zipper or magnetic snap
Crochet terms used
Worked examples in How to Line and Add Hardware to a Crochet Bag use standard US crochet terms: ch, sl st, sc, hdc, dc, inc, dec, st(s), row, and round. The pattern-abbreviation guide expands that notation.
Draft the lining
Block the crochet shell before measuring. For a rectangular bag with a boxed base, record the finished front width W, height H and base depth D in centimetres. Measure W across the front, excluding the depth of the sides. For two lining panels with 1.5 cm side and bottom seams and a 1.5 cm top turn-under, cut each rectangle to W + D + 3 cm wide by H + D/2 + 3 cm high. Do not add the depth again if you measured the already-flattened panel width instead of the front width.
Sew a scrap-fabric trial lining first and baste it into the blocked shell. The lining should fit without pulling or bulging; adjust before cutting the final fabric. This rectangular method does not directly fit an oval or shaped base.
Sew pockets and shell
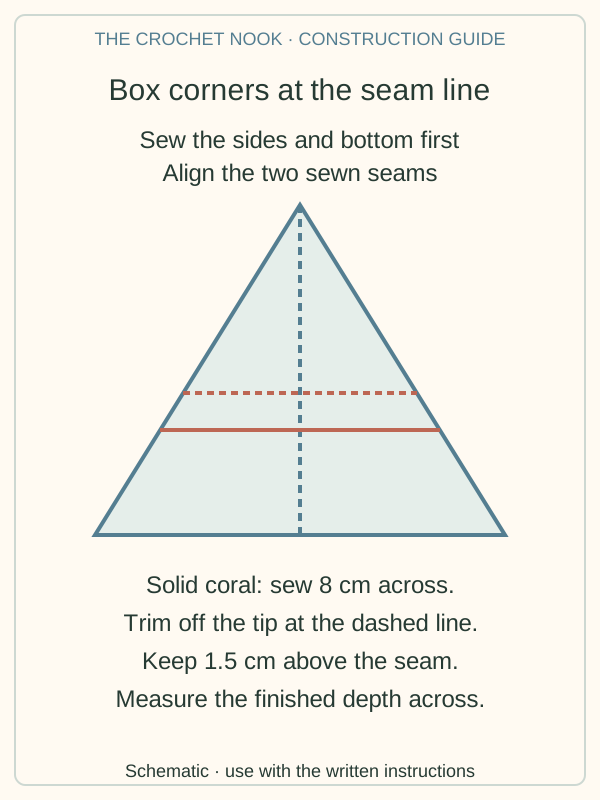
Attach pockets to the right side of one lining panel before joining the panels. Sew the sides and bottom with a 1.5 cm seam allowance and press the seams open. At each lower corner, flatten the fabric so the side seam sits directly over the bottom seam, forming a triangle. Mark a line perpendicular to the aligned seams whose length equals the required base depth D. For an 8 cm base, that line is 8 cm across. Sew along the marked line, then trim away the triangle tip while retaining 1.5 cm of fabric beyond the stitching. Repeat at the other corner and press. This seam-line method avoids confusing a raw-edge corner cutout with the finished depth. Insert the lining wrong sides together and confirm that it fills the crochet without pulling the top edge.
Install closure
For a zipper, hand-baste zipper tape between lining and crochet top, then backstitch through lining and a full crochet post without stretching. For a magnetic snap, install it through interfacing and a fabric reinforcement square before the lining enters the bag.
Reinforce hardware
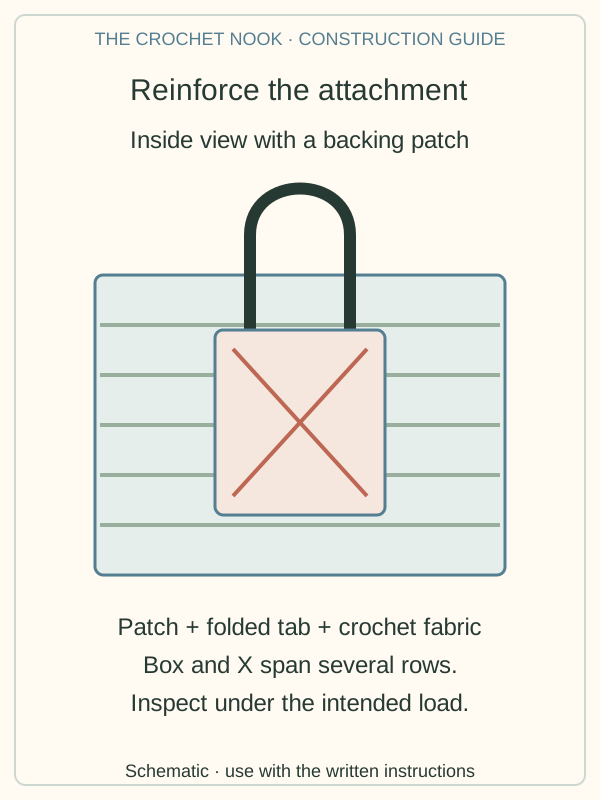
Make D-ring tabs from doubled fabric or dense folded crochet and anchor them across several side rows. Put a fabric patch behind each tab inside the lining, sew a box with an X through the patch, and test with more than the expected load. Hardware should never depend on one chain or one row-end stitch.
Close the lining
Fold the lining top edge under by 1.5 cm and slipstitch it to the bag just below the crochet edge. Keep the needle on the inner half of each crochet post so thread does not show outside.
Tips & troubleshooting
Test one variable at a time
When applying the advice in How to Line and Add Hardware to a Crochet Bag, change only hook, yarn, tension, or stitch placement before making the next comparison. Several simultaneous changes make it difficult to learn which correction worked.
Keep evidence beside the project
Label swatches and photograph important checkpoints. The recommendations in this guide become more reliable when paired with your measurements and the yarn's care label; keep both beside How to Line and Add Hardware to a Crochet Bag while working.
Stop before forcing a result
If the fabric, fit, or construction from this guide disagrees with your sample, pause at the earliest measurable checkpoint in How to Line and Add Hardware to a Crochet Bag. Undoing a short section is safer than disguising a structural problem at finishing.
Frequently Asked Questions
What skill level should I have?
This guide is planned for a beginner crocheter. Practice any unfamiliar stitch separately and read the complete construction in How to Line and Add Hardware to a Crochet Bag before beginning.
Can I change the yarn or hook?
Finish and block the crocheted shell before cutting the lining. If a yarn substitution changes the bag size or stretch, measure the actual shell again and adjust the fabric pieces and reinforcement accordingly.
May I sell the finished item?
Small-scale sales of finished items from this guide are allowed with credit to How to Line and Add Hardware to a Crochet Bag. Do not copy, sell, or republish the written instructions or site images.
Keep exploring
To build on How to Line and Add Hardware to a Crochet Bag, continue with 20 Boho Crochet Bag Ideas, Best Free Crochet Bag and Accessory Patterns, Crochet Bucket Hat Pattern for Beginners. For a broader route through the site, use the Ultimate Free Crochet Pattern Library.

Essential crochet guides
Maker notes
Questions or finished-project notes?
Share what helped, ask about a step, or leave a thoughtful note for the next maker.
Loading maker notes...